Download Software Sap R 3
This updated step-by-step installation guide will help you install SAP software and walk you through a process of getting FREE of any charge & official SAP software locally on your PC, with up-to-date links relevant from the end of 2021 up to March 2023.
Updated November 2021
We've completely updated the step-by-step guide of getting the newest SAP system for practicing ABAP.

Table of contents
- Before You Start to Install SAP
- #1 – What SAP System Will You Install Here?
- #2 – What Does This SAP Install System Contain?
- #3 – What Other Options Do You Have to Install SAP or Just Access the System?
- #4 – Join FREE Support to Install SAP as easy as possible
- ULTIMATE STEP-BY-STEP SAP INSTALLATION GUIDE
- Prerequisites to Install SAP software
- Hardware Requirements to Install SAP
- Software Requirements
- Download Installation Files
- Create "sapinst" Folder
- SAP Netweaver 7.52 SP04
- VirtualBox
- VirtualBox Extension Pack
- openSUSE
- VirtualBox Installation
- VirtualBox Extension Pack Installation
- VirtualBox Setup
- Linux Installation – openSuse
- Completing Linux Installation
- Proxy Setup
- Command Line
- Space Availability
- Setup Shared Folder
- Reboot openSUSE
- uuidd daemon
- Change Hostname
- Map Hosts to New Hostname
- Extract SAP Installation Files
- Assign ROOT privileges
- Update ASE License to Install SAP Correctly
- Intall SAP Server
- Port Forwarding
- Start SAP Server
- Intall SAP GUI
- SAP GUI Setup
- Log in to the System
- Generating New License
- Stop Server
- Troubleshooting
- Not possible reach the vhcalnplci.dummy.nodomain or vhcalnplci:8000
- Setting Up Web IDE
- SE80 Windows are Resized
- Shared Clipboard in VirtualBox not Working
- Call to NEMR0InitVMPart2 failed: VERR_NEM_INIT_FAILED (VERR_NEM_VM_CREATE_FAILED).
- pic#0: Config mismatch – uApicMode: saved=2 config=3 [ver=5 pass=final] (VERR_SSM_LOAD_CONFIG_MISMATCH).
- Are you Ready to Start Growing Your ABAP Career?
Before You Start to Install SAP
#1 – What SAP System Will You Install Here?
This SAP installation guide will help you install your local, FREE of any charge, and official SAP Netweaver AS ABAP 7.52 SP04 software.
The SAP system is suitable for:
- Learning and Practicing ABAP programming locally on your PC
- BW/BI administration and programming
- SAP system administration
You will install this SAP system on a virtual machine which brings multiple advantages over installing it directly on your OS:
- [PORTABILITY] Easy to transfer installed SAP system to a different PC
- [CLEAN INSTALLATION] Installation on a virtual machine will keep your current OS clean without changing registers etc.
- [EASY BACKUP] It's the matter of copying the whole folder with the virtual machine to your external hard drive
- [EASY UNINSTALL] If you decide to stop using SAP, you just delete the virtual machine folder
The goal of this article is to install your SAP system on your local computer so that you can start practicing ABAP programming right away.
#2 – What Does This SAP Install System Contain?
Technically this is what the SAP system includes:
#3 – What Other Options Do You Have to Install SAP or Just Access the System?
There are 4 options for getting access to the SAP system.
A. [FREE] MANUAL WAY – This step-by-step guide helps you to get this SAP system option
PROS – it's free + you get a real SAP system running locally on your PC
CONS – it takes several hours to install it. SAP installation is a complex process that includes the installation of multiple software components on your computer and requires administration skills
B. [FREE] ONLINE ABAP EDITOR
If you are new to ABAP and you want to check if ABAP is really for you, this is something you should consider. This solution has multiple limitations and is good just for simple ABAP programs.
PROS – the fastest access to SAP system for practicing ABAP
CONS – it's only for people who are having first touches with ABAP and just want to try out if ABAP is something for them. This system does not contain all the features as if you would see in a real SAP system.
RESOURCE: to access our ABAP Academy Online ABAP Editor, click here
C. [PAID] Get remote access to SAP system
On the internet, you can find multiple solutions providing access to the SAP systems remotely. It means, you don't have to install SAP server on your own and you just connect to their remote system and start programming right away.
PROS– fast solution
CONS– it is a priced option. It costs from $30-$180 per month + you always need to be connected to the internet to use the SAP system.
RESOURCE: Remote access service that we keep recommending is this one (FYI, we are affiliate partners for this remote system and we get the commission if you buy access from this link. You will not be charged any extra fees for using this link)
D.[PAID] DONE FOR YOU WAY – Download fully preinstalled local SAP system
This is the solution that contains a fully pre-installed and pre-setup SAP system which you are going to install right now in this step guide. If you would like to skip this installation process and save time to focus on using this SAP system right away, this is the option that will help you to save hours of installation time.
PROS – fastest way of getting your local SAP system. You skip the installation and setup process and just download a pre-installed virtual machine (VM). You just start the VM and you are done.
It's a one-time payment option containing support with no additional fees
CONS – it is a paid option
RESOURCE: More information about Fully Pre-installed Local SAP system here
#4 – Join FREE Support to Install SAP as easy as possible
If you have decided to go with this SAP installation process, join this group with people who are going through the same process or who have successfully installed this SAP system in past.
This group is for you to help each other to make this installation process as smooth as possible.
Join the Support Group HERE >>
ULTIMATE STEP-BY-STEP SAP INSTALLATION GUIDE
Prerequisites to Install SAP software
Hardware Requirements to Install SAP
To install a FREE SAP system requires the following OS requirements.
- x86_64 processor-based hardware
- at least 6 GB RAM and about 8 GB swap space
- about 100 GB free disk space for the server installation
- about 2 GB free disk space for the client installation
Stable internet connection without data restrictions, because you will be downloading about 20GB of data.
Software Requirements
OS Windows 10 / Windows 11
We run this whole installation on Windows 10.
What if you don't have Windows?
SAP GUI is best compatible with Windows. That's why we highly recommend doing this installation there if you plan to use this system for practicing ABAP. Otherwise, you will not be able to use the most out of the ABAP Editor features.
On your Windows, we will install virtualization software (Virtualbox).
And on your virtual machine, we will install openSuse Linux distribution where we will do the setup and also the SAP system installation process.
Download Installation Files
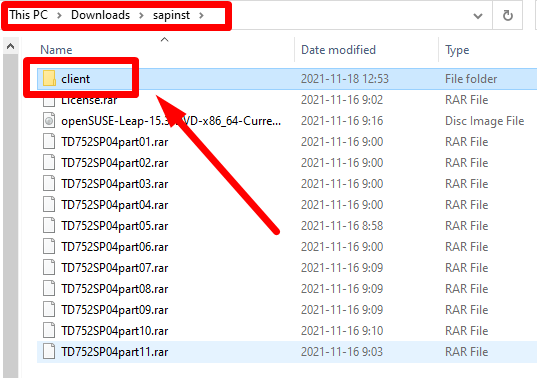
Create "sapinst" Folder
The download will take you quite some time because you are going to download about 20GB of data.
To keep all the steps the same for you in this process, we advise you to create the folder inside of your Downloads folder with the "sapinst" name.
The reason why is because we will be referring to this folder later in the Linux machine.
If you are new to Linux a" well" this will help you to avoid any potential mistakes during the Linux setup and the whole SAP installation process.

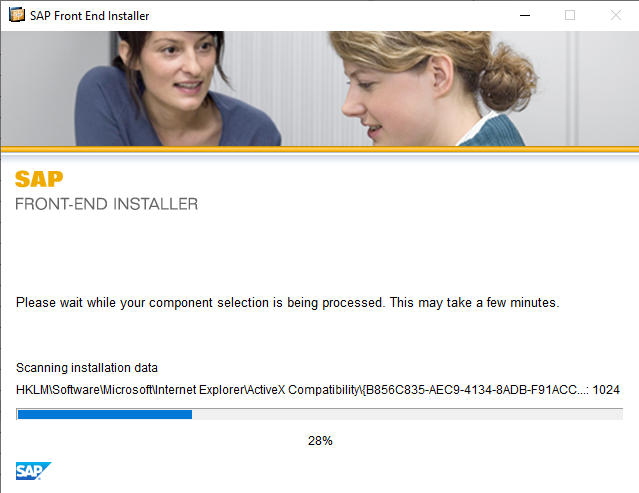
SAP Netweaver 7.52 SP04
Please foll"w this guide to download the latest SAP system installation files, and once you'll be done, come back:
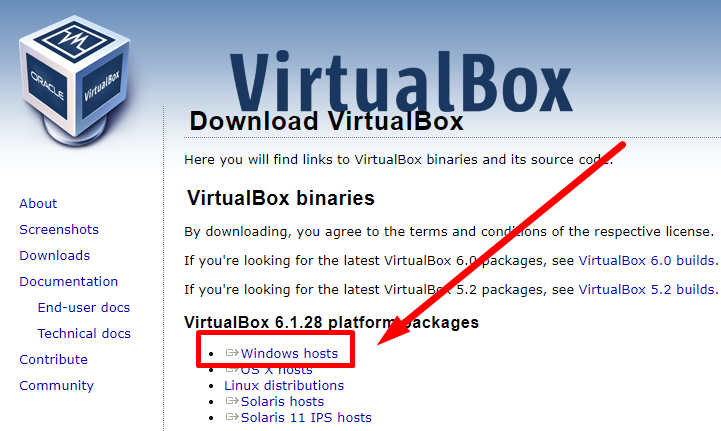
VirtualBox
Go to https://www.VirtualBox.org/wiki/Downloads and download the VirtualBox installation file.
For Windows OS containing all the requirements for this SAP system, choose the most current installation for Windows.
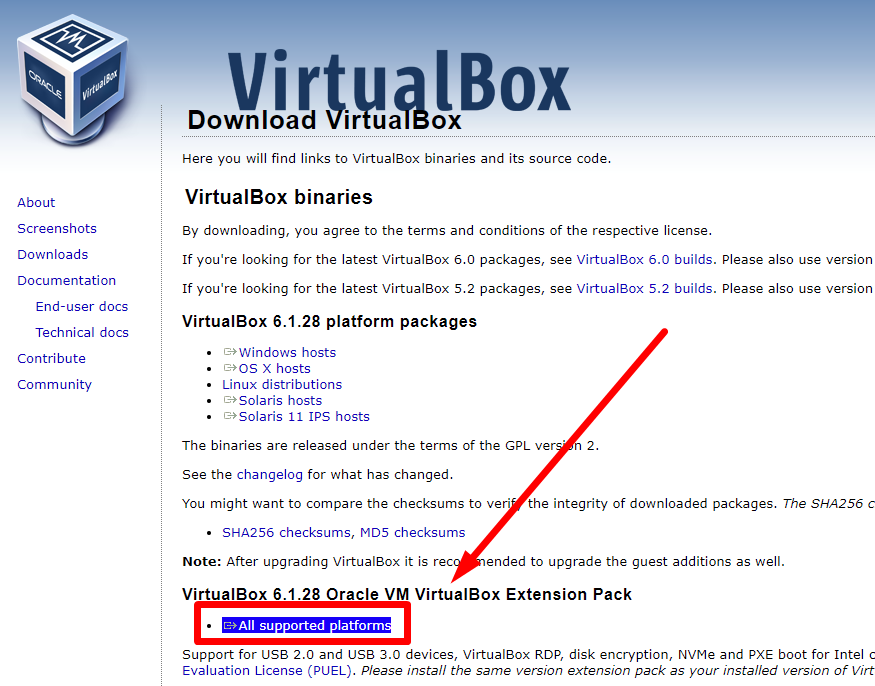
VirtualBox Extension Pack
To run the whole server on VirtualBox properly, we need to download VirtualBox Extension Pack on the same page.
Go to https://www.VirtualBox.org/wiki/Downloads
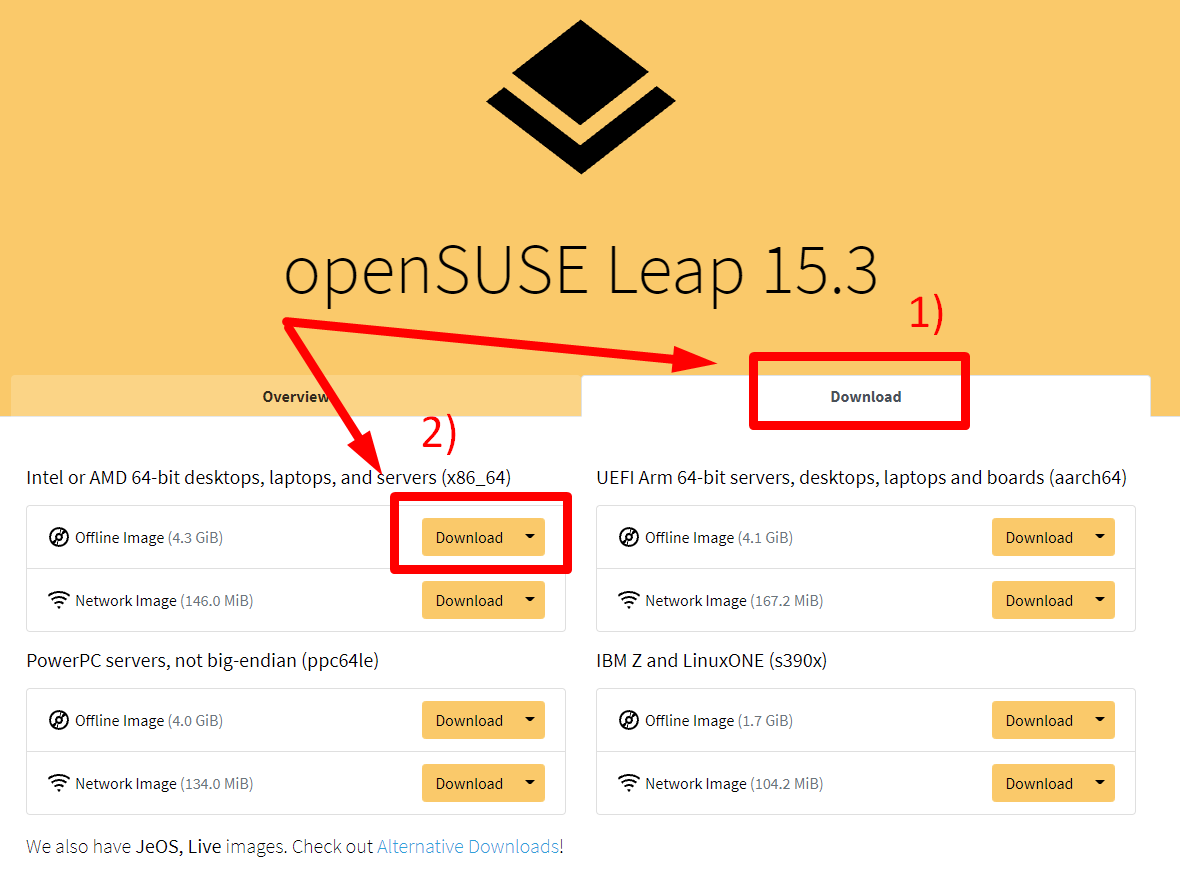
openSUSE
Download openSUSE Leap to your local machine (64 bit, released version) from https://get.opensuse.org/leap
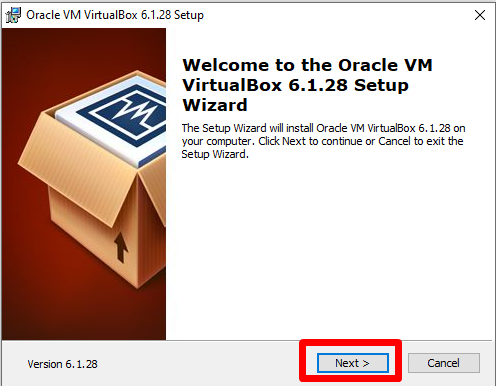
VirtualBox Installation
This is an OS where we will install SAP software.
Doubleclick on the downloaded EXE file to start the installation
Click "Next" to continue to the next screen
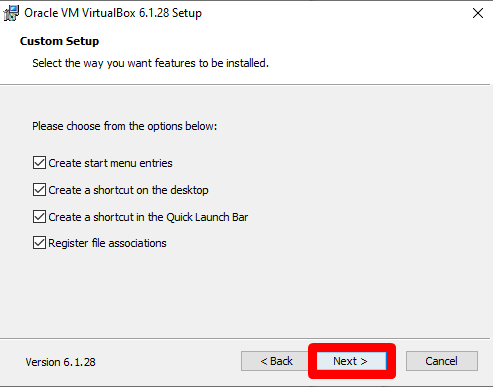
Leave the suggested settings and hit the "Next" button
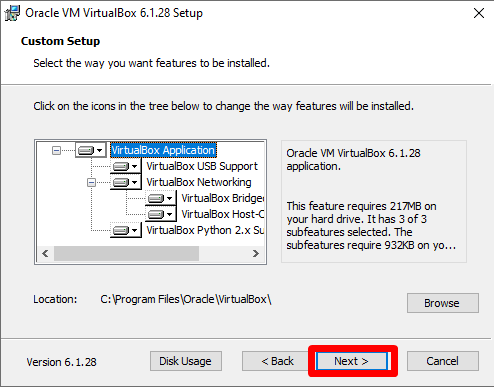
We leave all the default setting here as well.
Hit "Next"
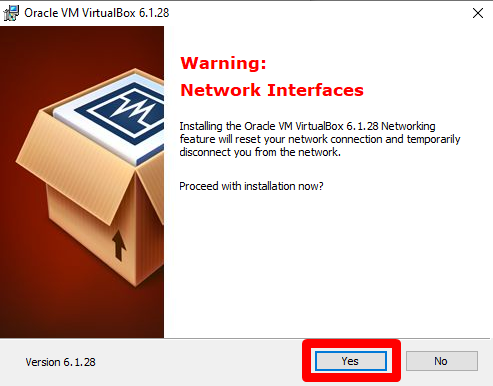
Accept the warning of Network Interface and hit "Yes"
And now we are ready to hit "Install"
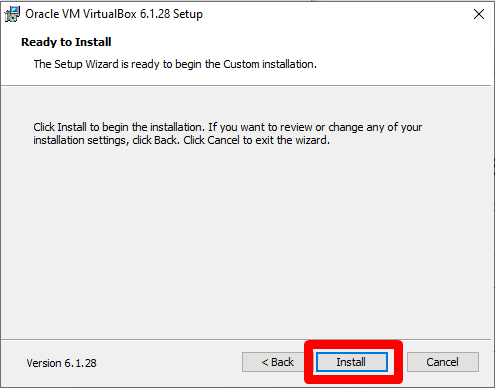
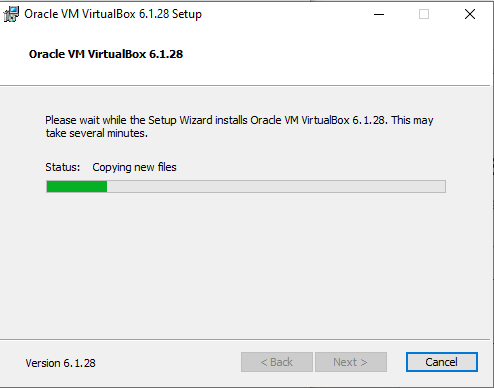
So installation will proceed for a few seconds
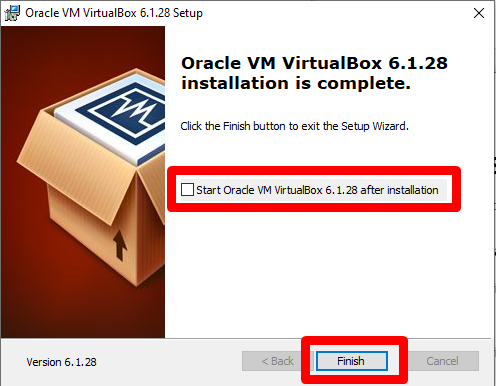
Once the installation is done, uncheck the box to Start the VirtualBox, because we will continue with the installation of the Extension Pack
VirtualBox Extension Pack Installation
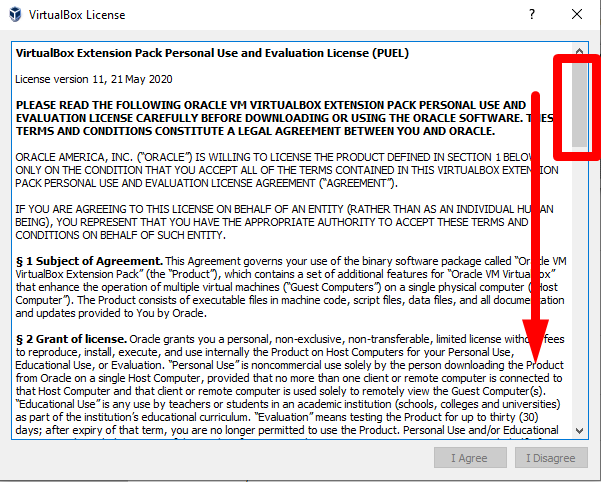
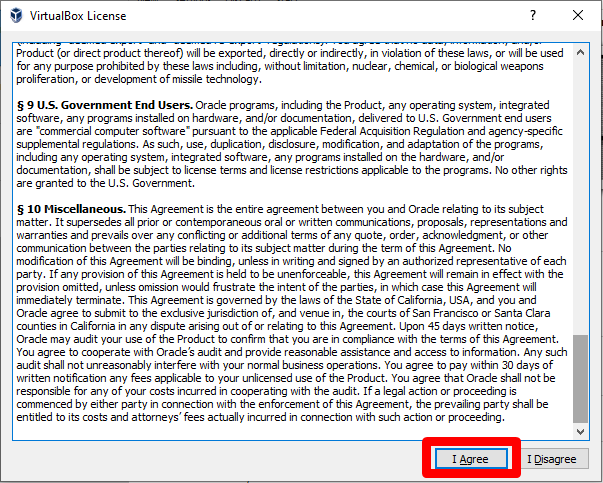
Scroll down through the License Agreement to activate the "I Agree" button
And hit "I Agree"
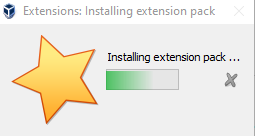
Installation will process
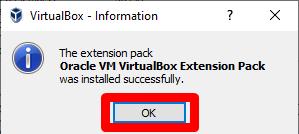
Once done, confirm the completion by hitting "OK"
VirtualBox Setup
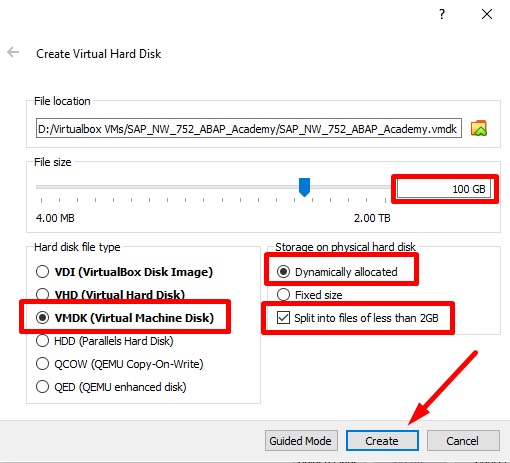
In this phase, we will set up a VirtualBox environment where we will then install openSUSE Linux and install SAP as well.
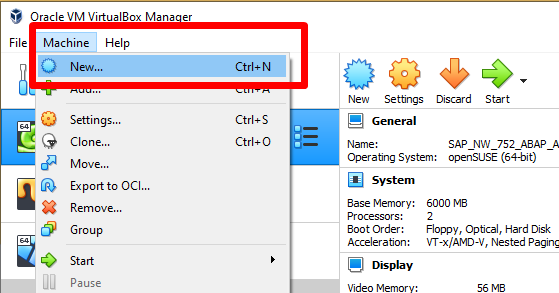
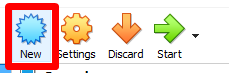
Or click directly in the main window of VirtualBox
Set the following parameters of the VM.
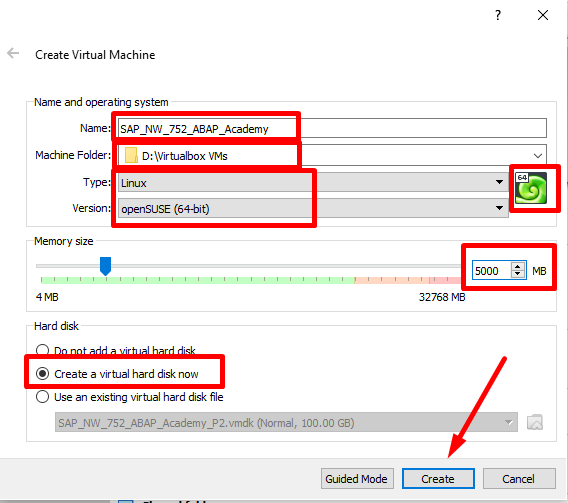
A new machine is created
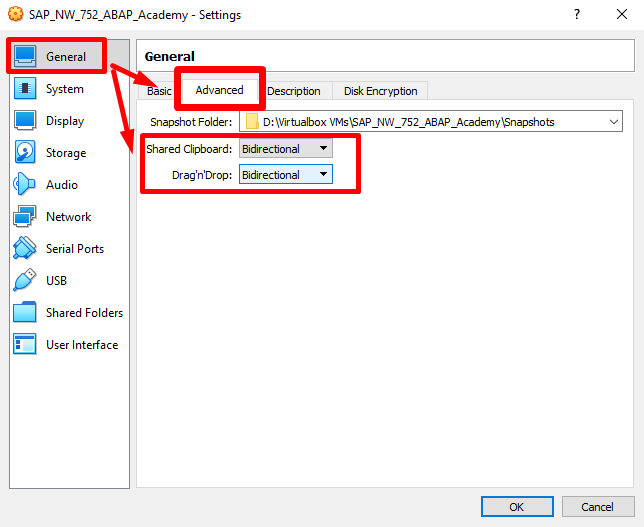
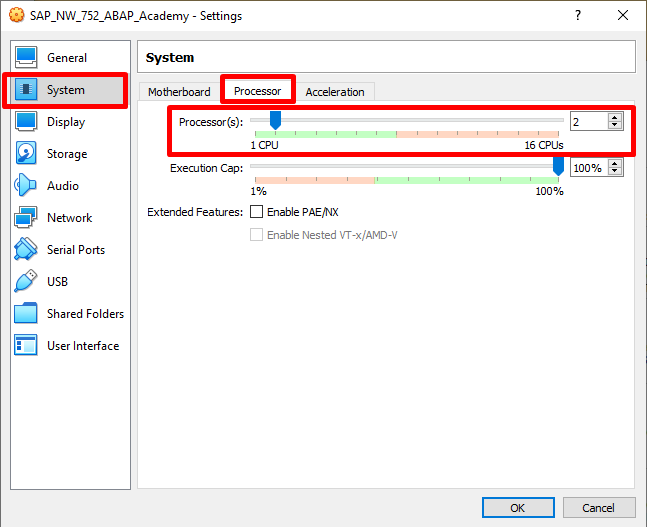
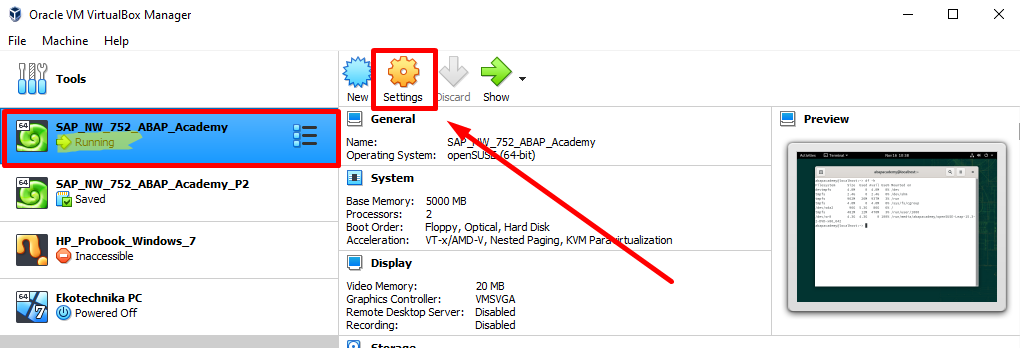
Go to VM Settings to set up the machine parameters
Make sure that you share your clipboard and also enable drag and drop functionality to make it easier to copy and paste some Linux commands in the future
.. and if possible, add more CPUs to the VM:
Hit OK.
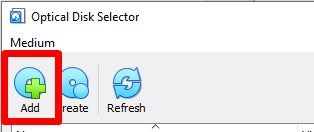
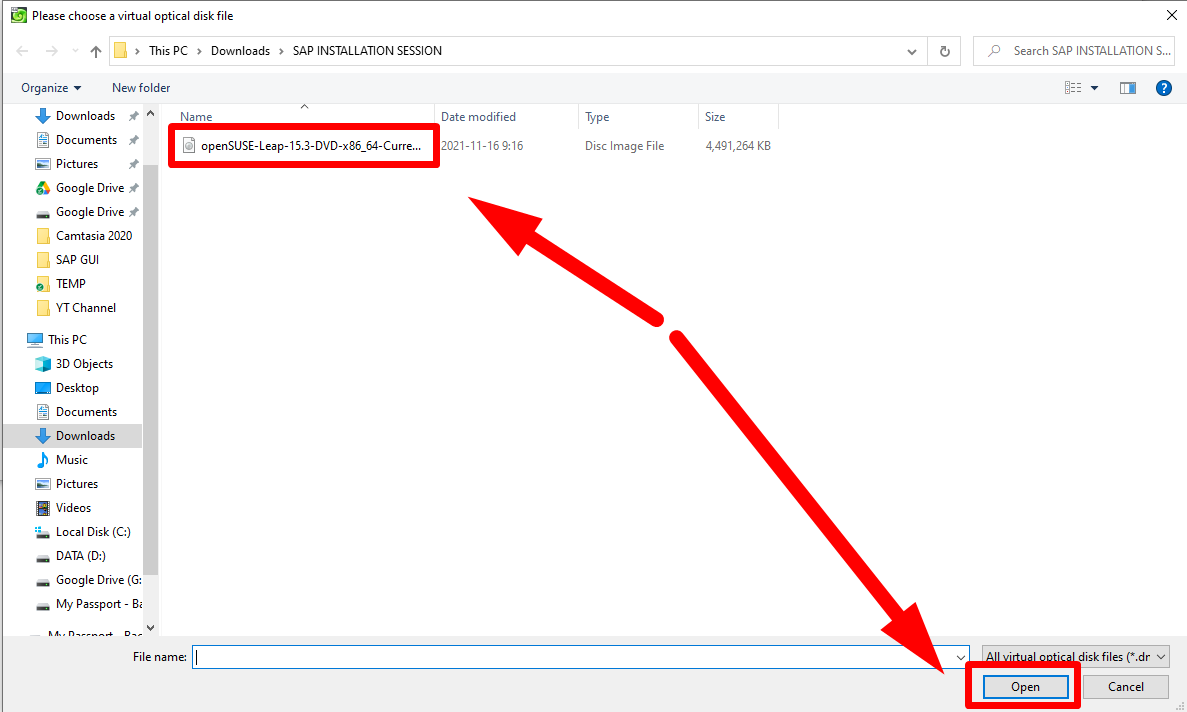
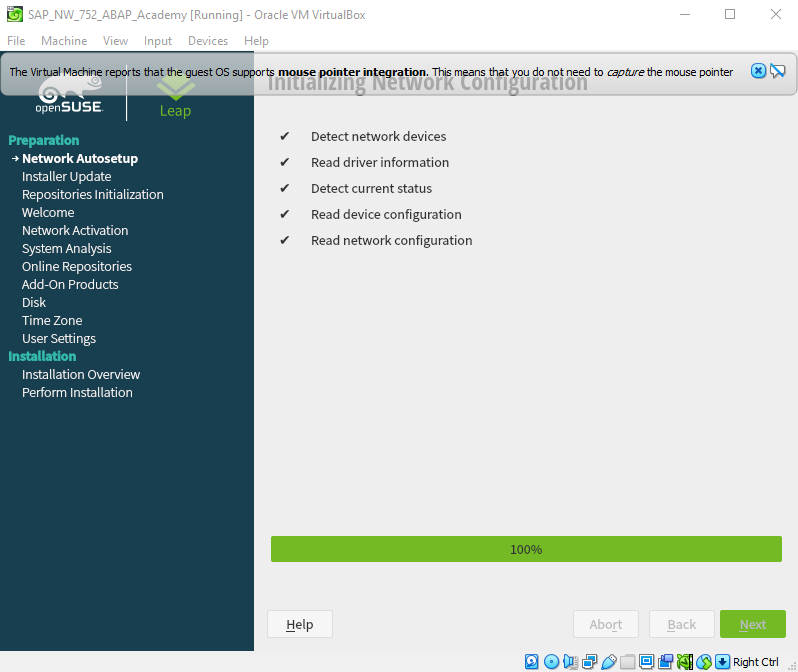
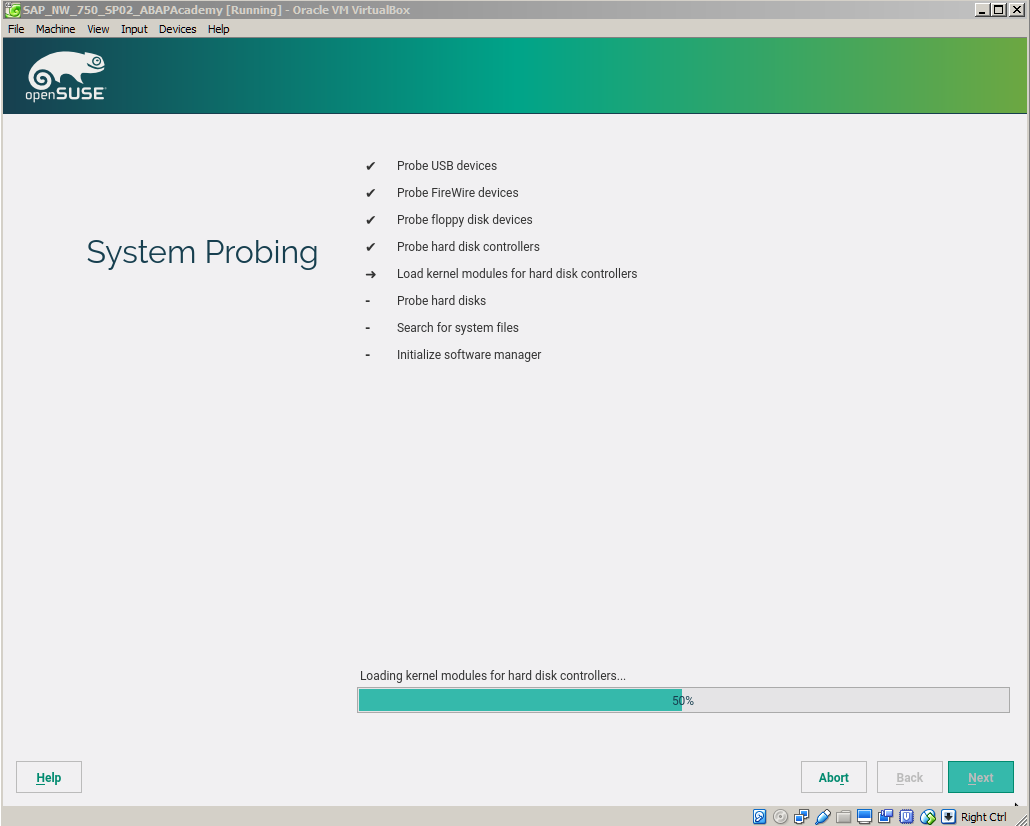
Linux Installation – openSuse
In this section, we will install openSUSE Linux on a virtual machine so that we can install SAP on it later on.
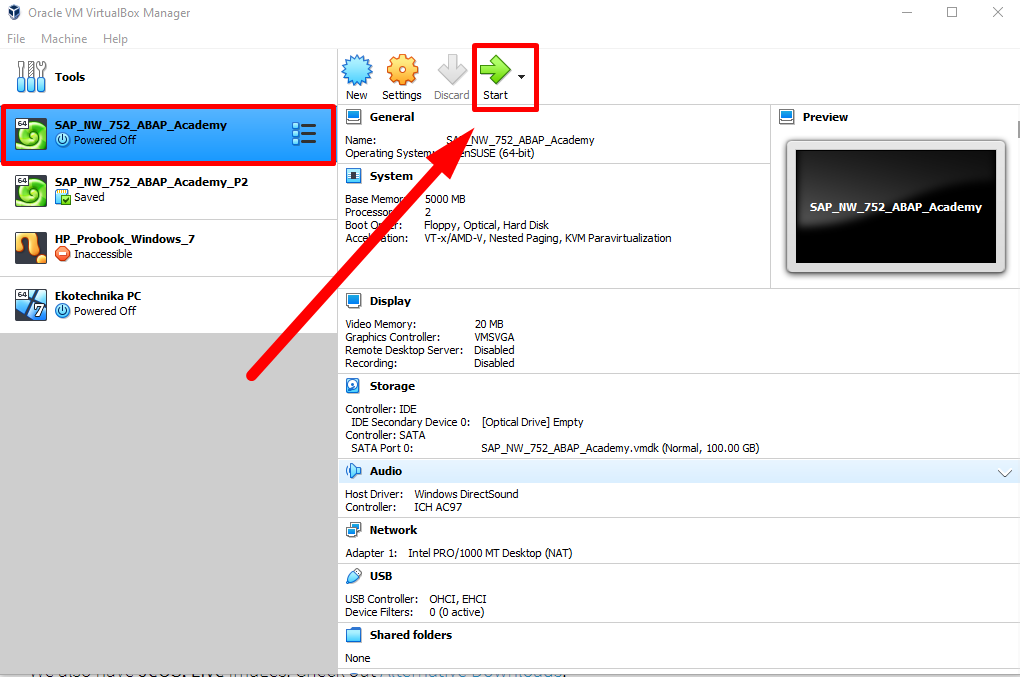
Start the VM.
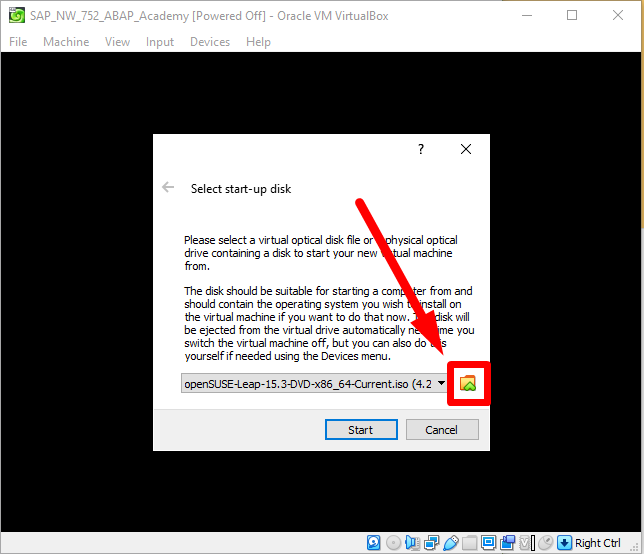
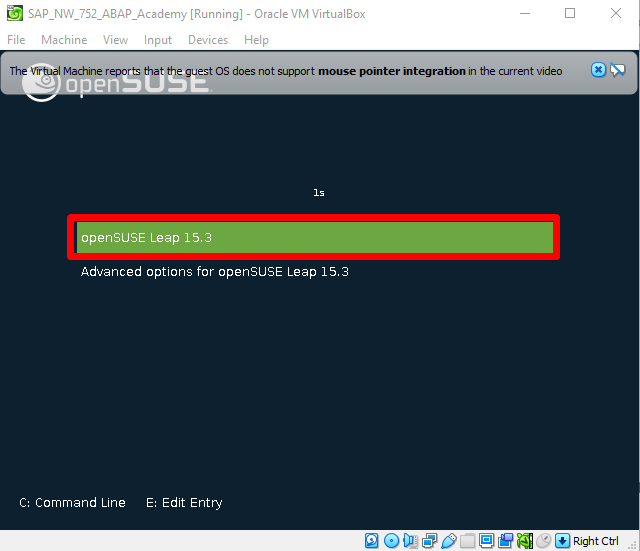
Choose .ISO file and hit "Start"

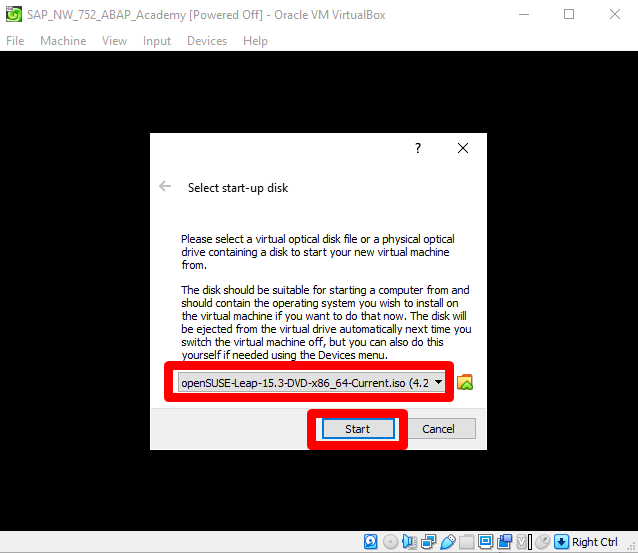
Choose "Installation" and hit "Start"
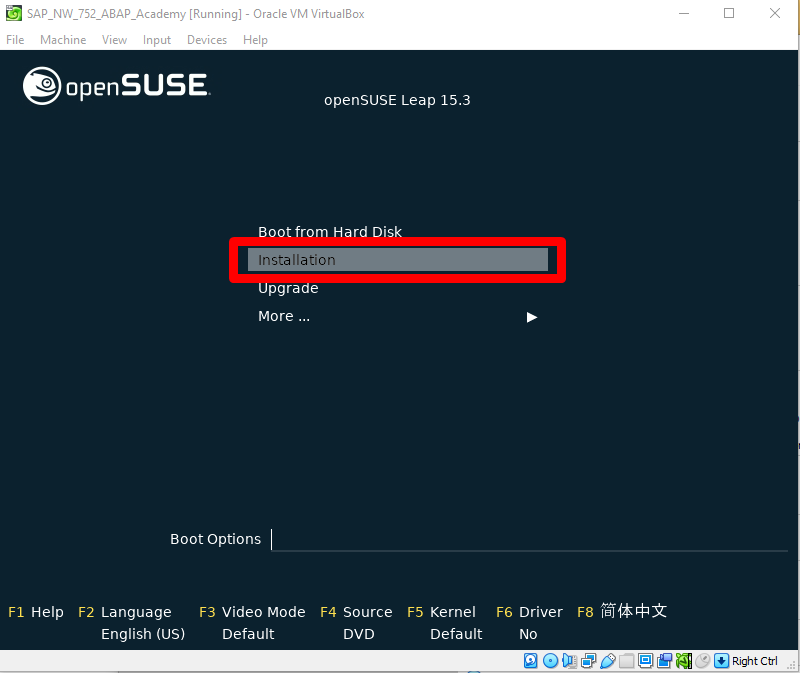
And wait while installation is done with its processing. This may take a few minutes, depending on the hardware setup.
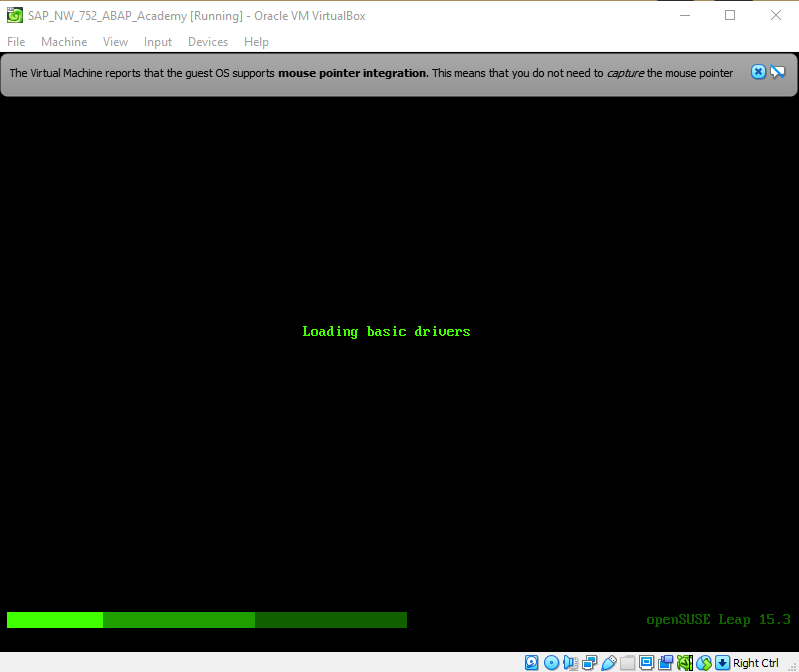
Let's wait until the installation process stops for your action.
In the meantime, you will be seeing screens like these.
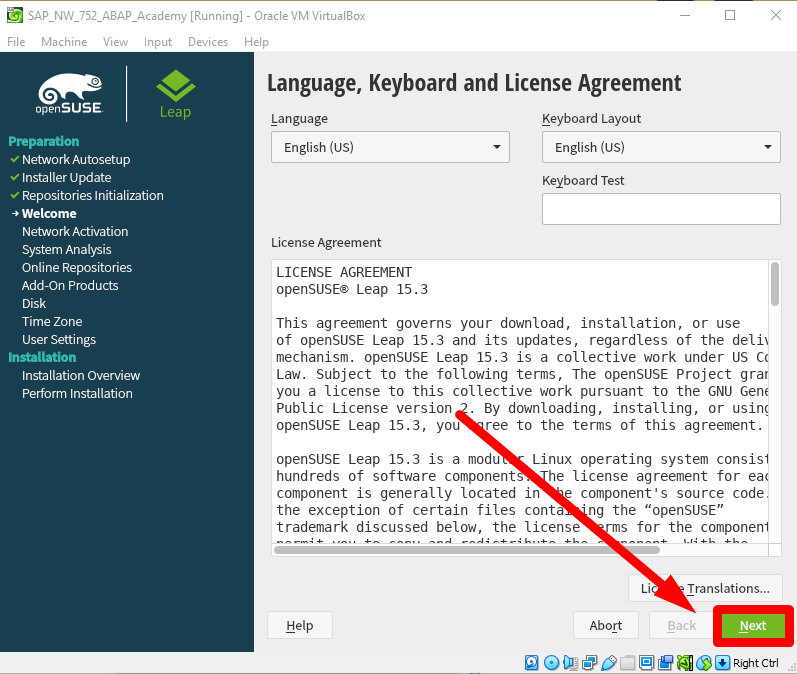
Accept License Agreement by clicking on "Next"
Then installation proceeds:
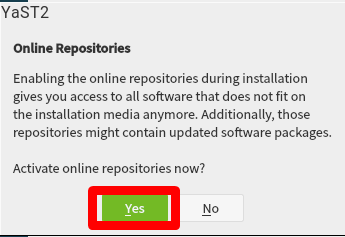
When YasT2 popup opens up, click "Yes".
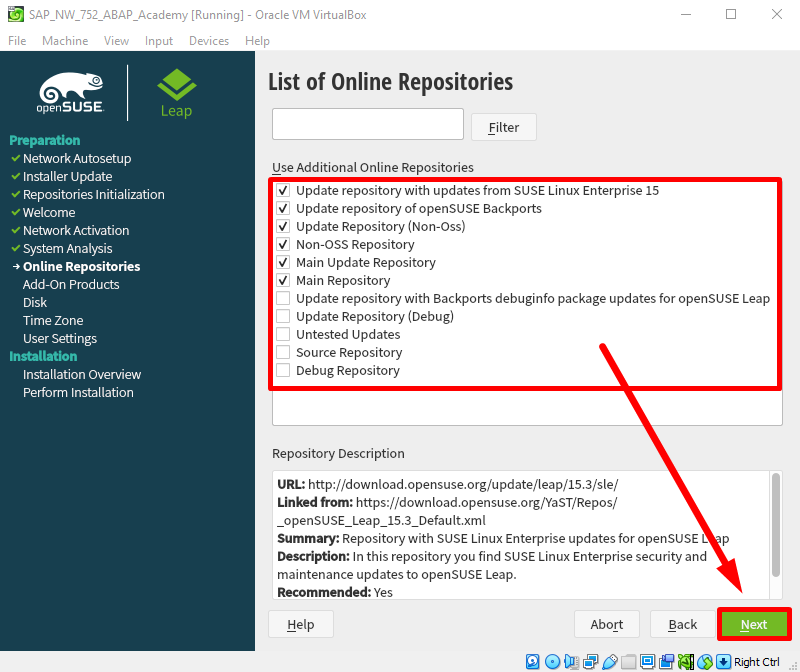
Then choose the next in the following window.
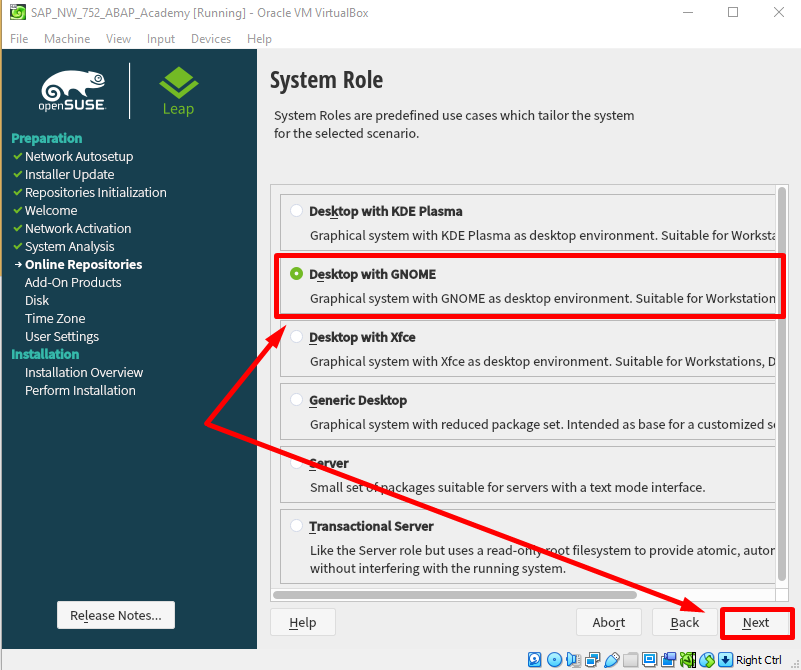
Then choose Desktop installation type:
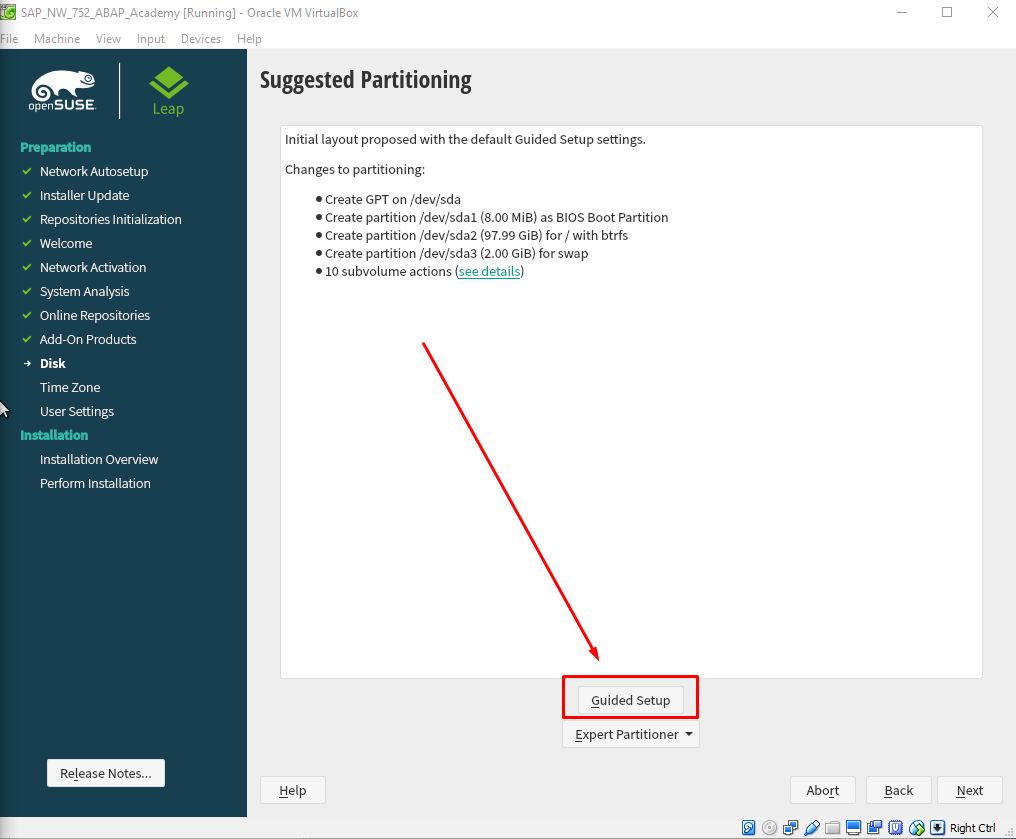
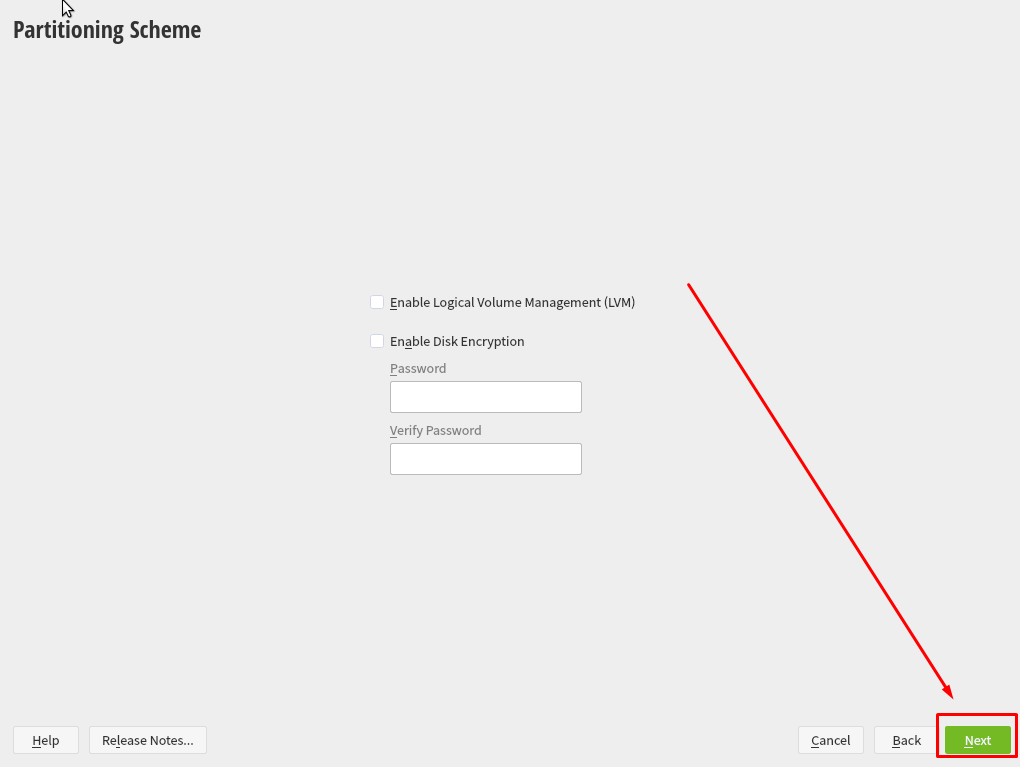
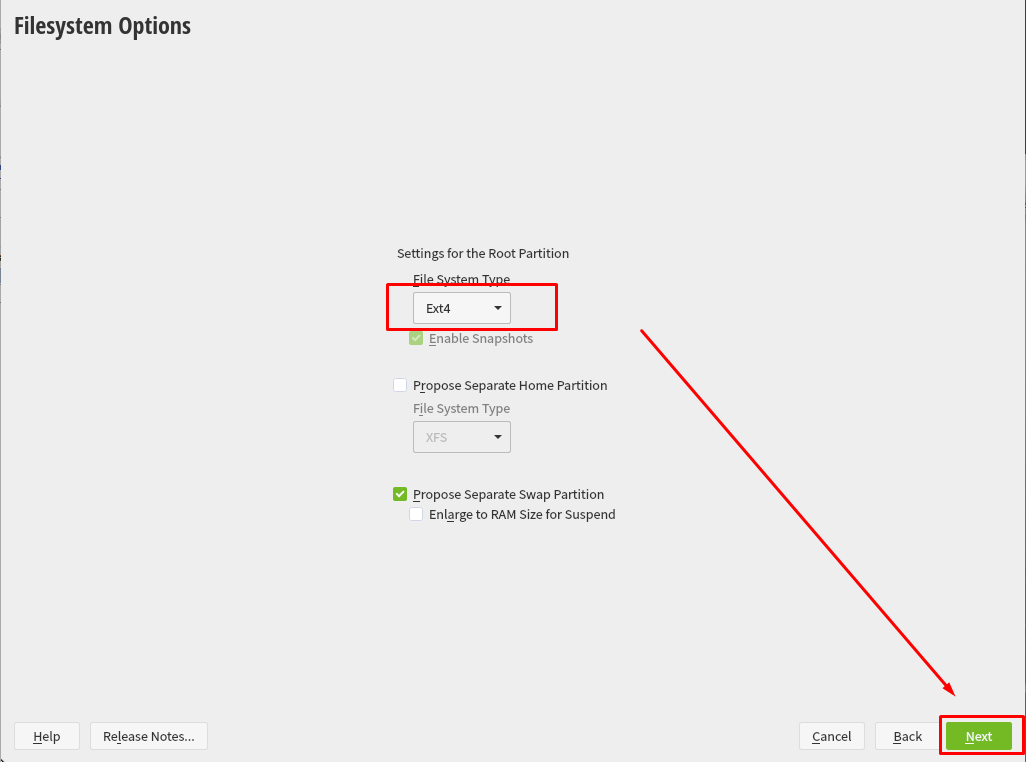
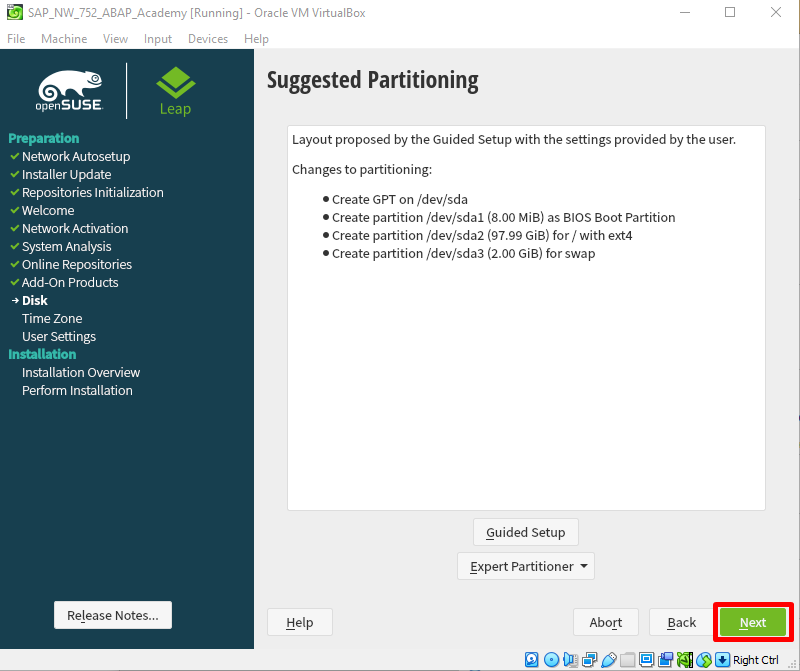
Hit on "Guided Setup" in Suggested Partitioning
Leave the following screen empty
Completing Linux Installation
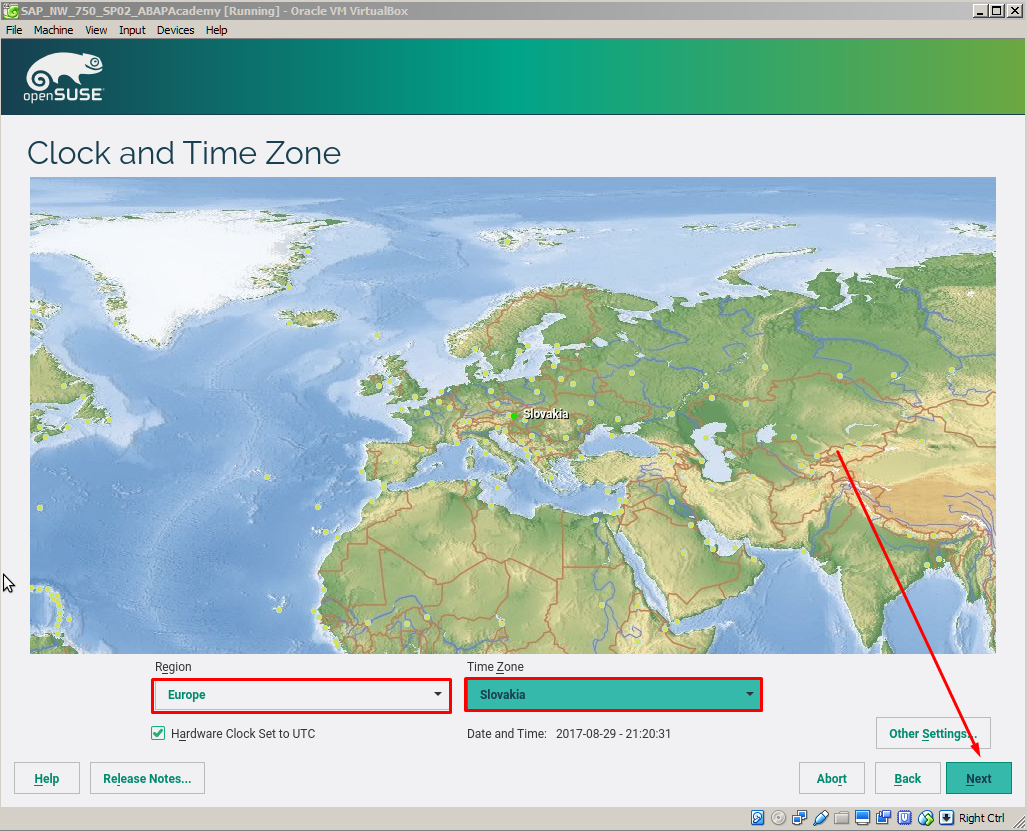
Select Time Zone and hit "Next"
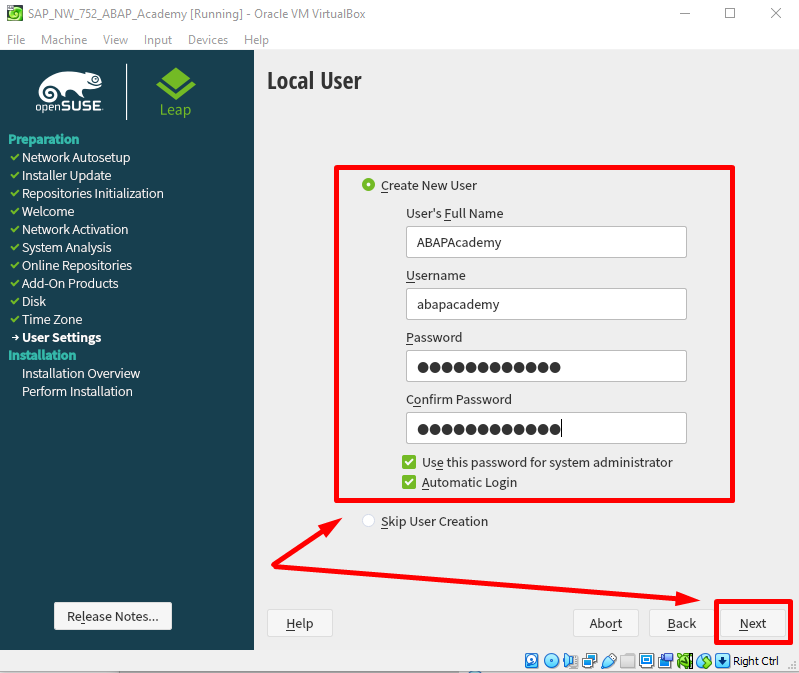
Create New User.
User's Full Name: ABAPAcademy
Password: "SAPSystem777"
Notice: password must be at least 7 characters long, it should contain lower/upper case + numbers. No special characters. It may cause you issues later when running SAP.
Recommended: we recommend you use the same password to minimize the risk of doing any mistakes in the installation process
Then hit "Next"
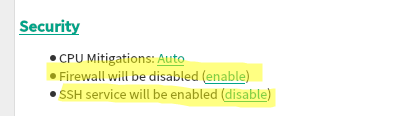
IMPORTANT: Change Installation Settings
- Disable Firewall
- Enable SSH service
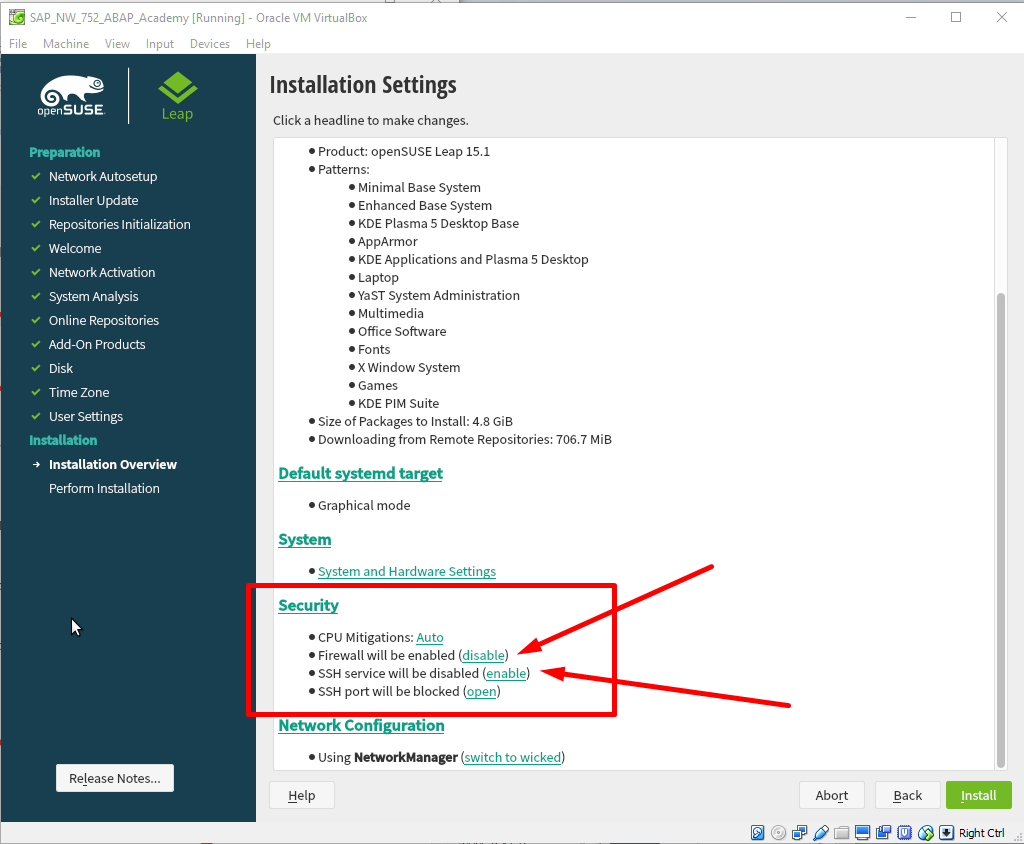
This is how it should look like
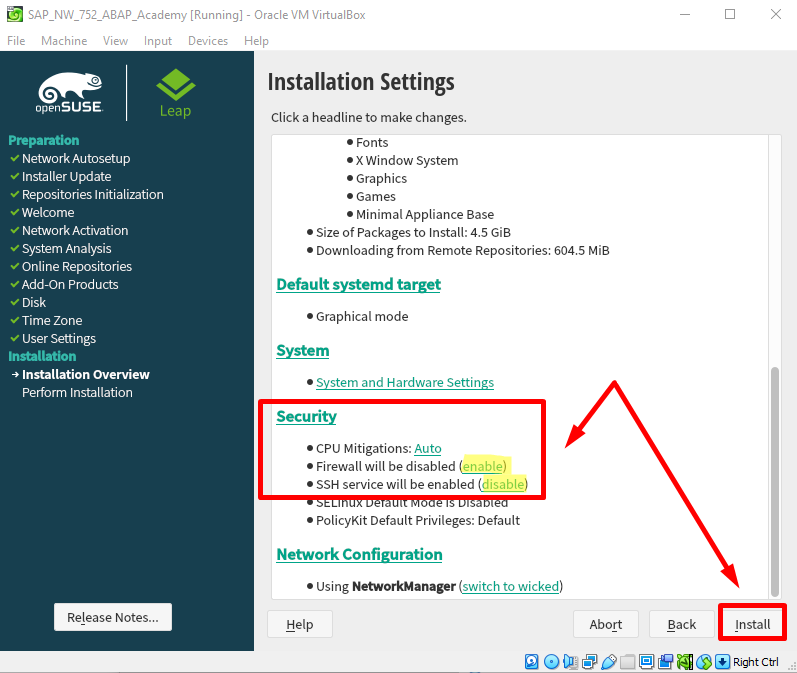
Hit "Install".
.. and confirm by selecting the same button
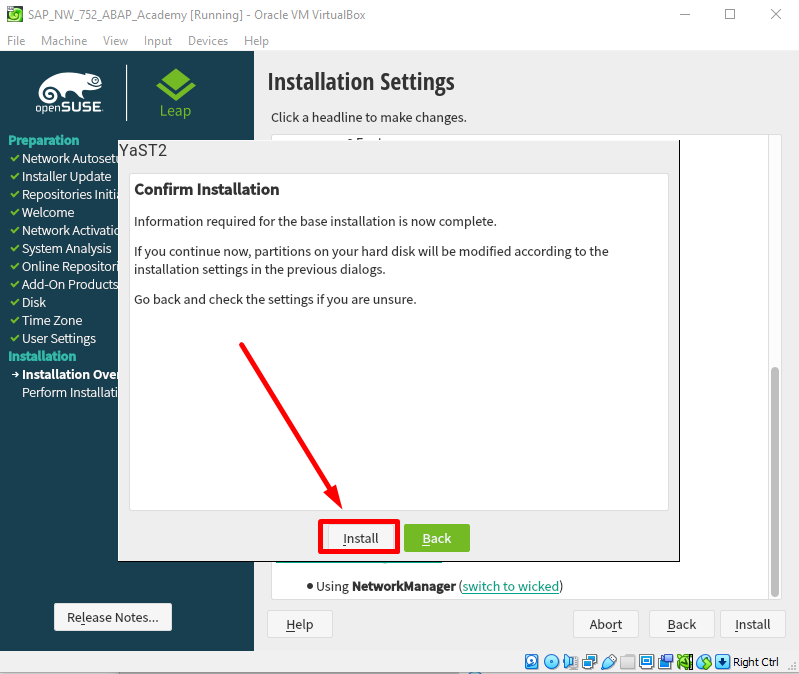
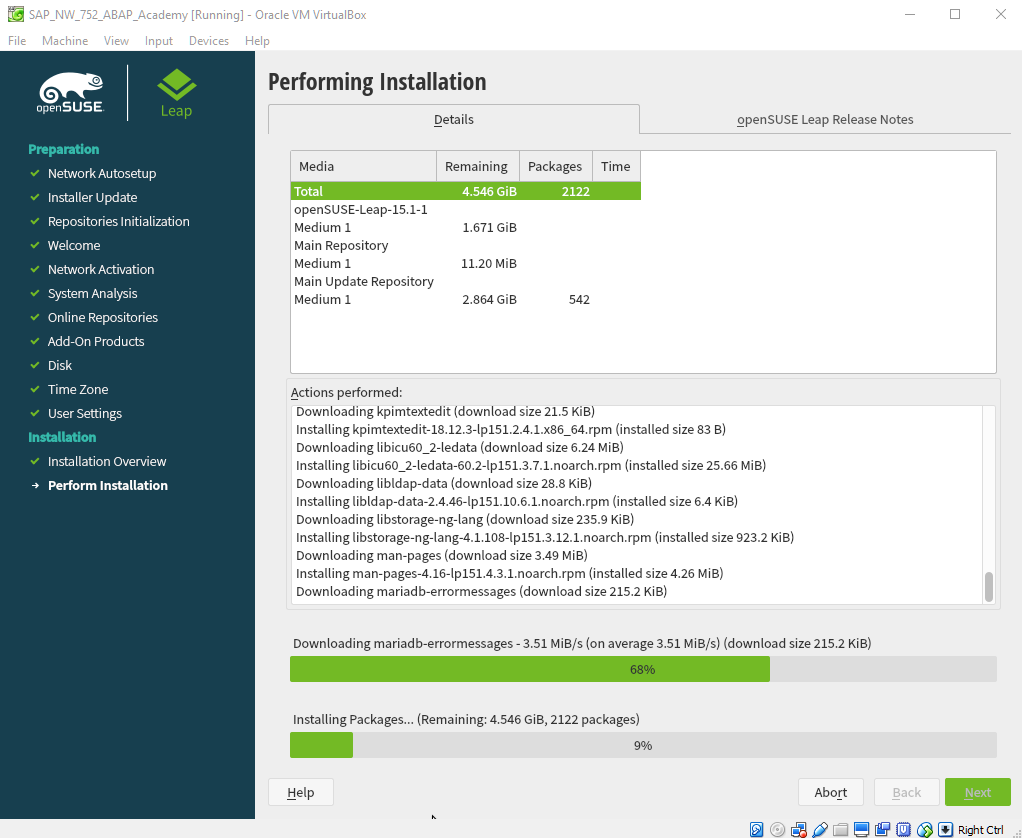
And installation can finally start

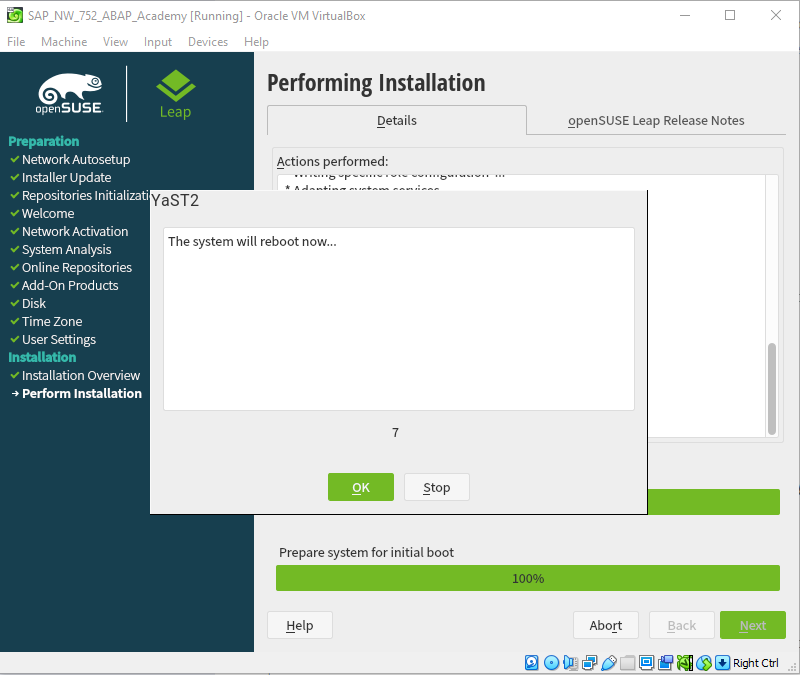
When the installation is done, the system is restarted.
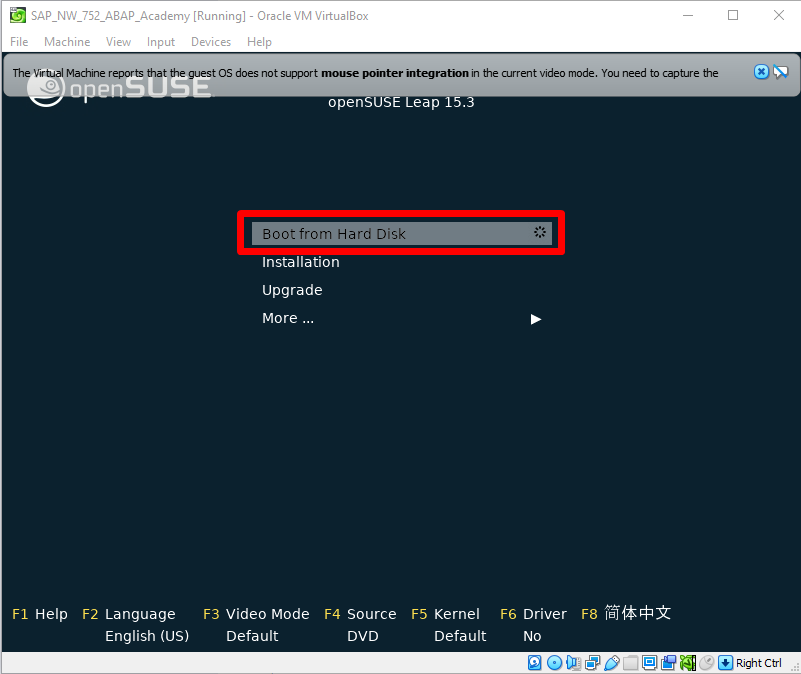
Choose "Boot from Hard Disk" to start the system.
Linux Setup – openSUSE
Once the Linux is installed, we have to set it up properly so that we can install SAP software on this distribution.
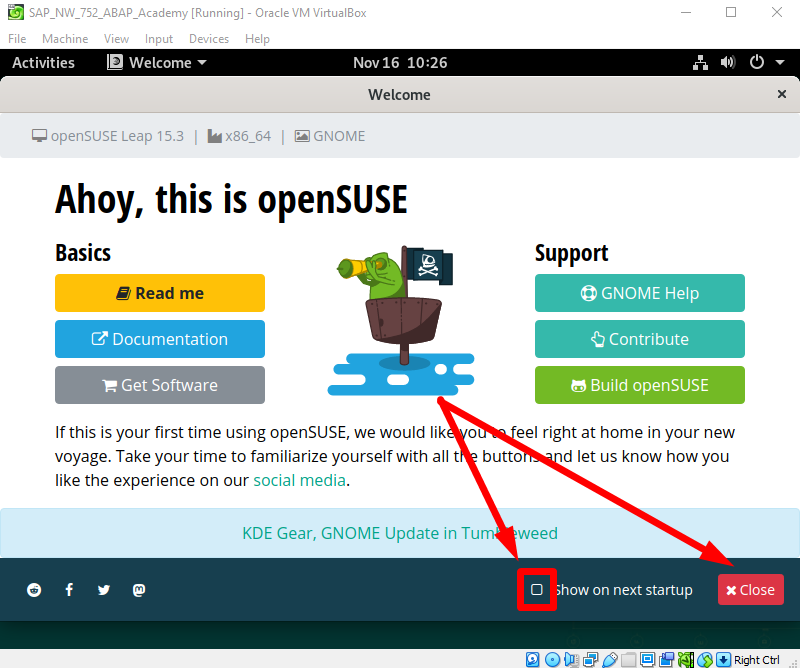
After booting, untick the "Show on next startup" checkbox.
Directly after installation, we have to set up the system to make it ready for running the SAP system.
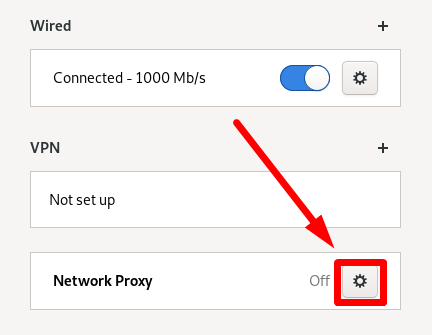
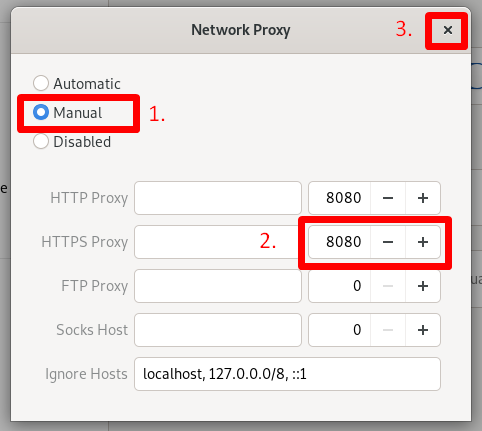
Proxy Setup
Change the http / https proxy settings according to your network and set the port to 8080

Command Line
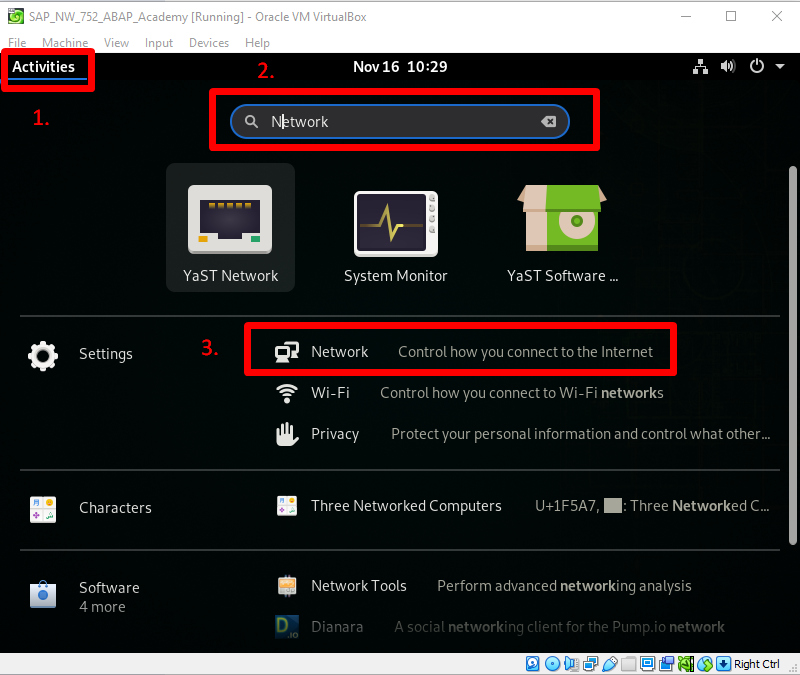
Go to the command line by pressing "Activities" and typing "Terminal".
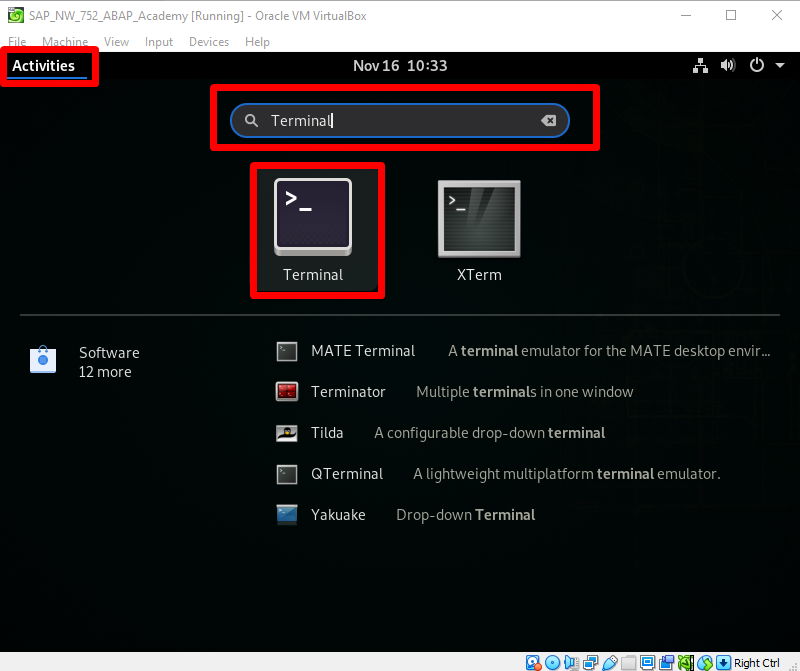
And choose "Terminal" from the list.
Space Availability
Type command: df -h
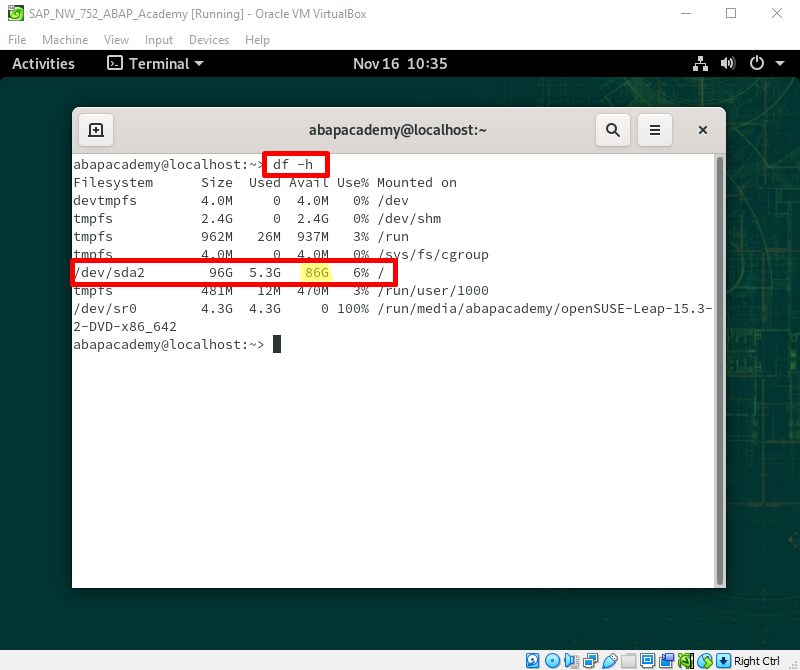
Notice: Minimum space in a Home directory should be 33 GB to avoid memory issues during installation. (If you are using the same setup as proposed in this ebook, you should have more than 86GB of free space)
Setup Shared Folder
Before we can access SAP installation files from a local folder located in your host Windows system, we need to make a few changes to our VM software to make the shared folder accessible.
Go to VirtualBox main window and choose Settings -> Shared Folders.
IMPORTANT: your system should still be up and running.
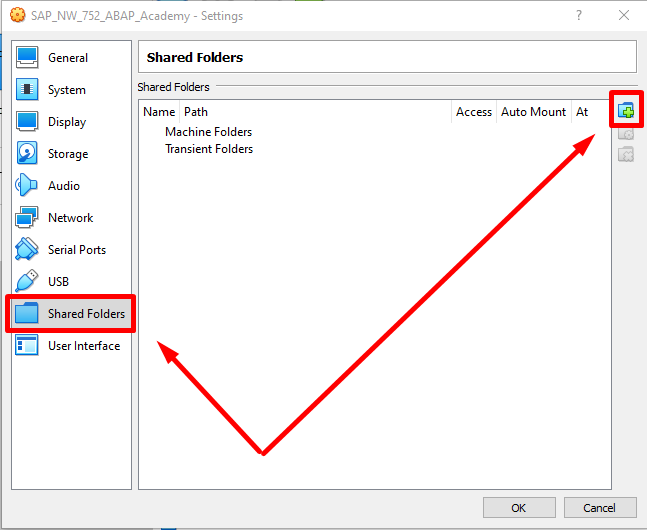
Click on the "Add new shared folder" icon and choose the folder where your SAP installation files are downloaded.
Choose the following settings:
- Auto-mount
- Make Permanent
I choose "sapinst".
Recommended: Choose the same Folder Name, to make the process straightforward
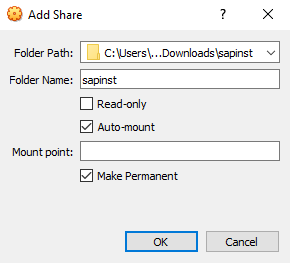
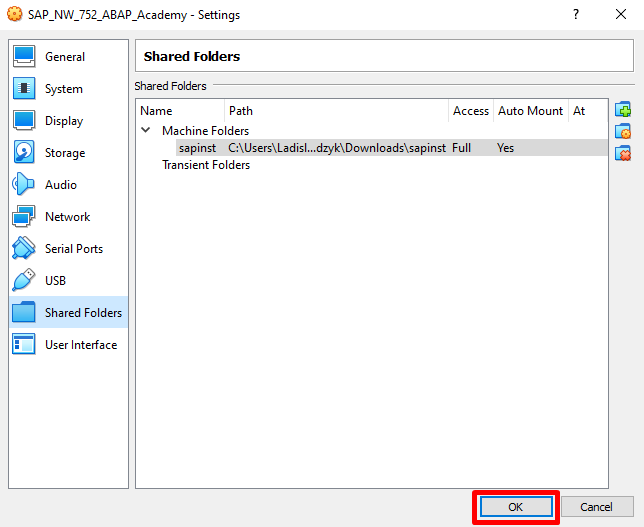
Click "OK".
Then click "OK" once more.
Reboot openSUSE
Now it's time to REBOOT the system.
uuidd daemon
This daemon is essential to generate database keys needed by SAP.
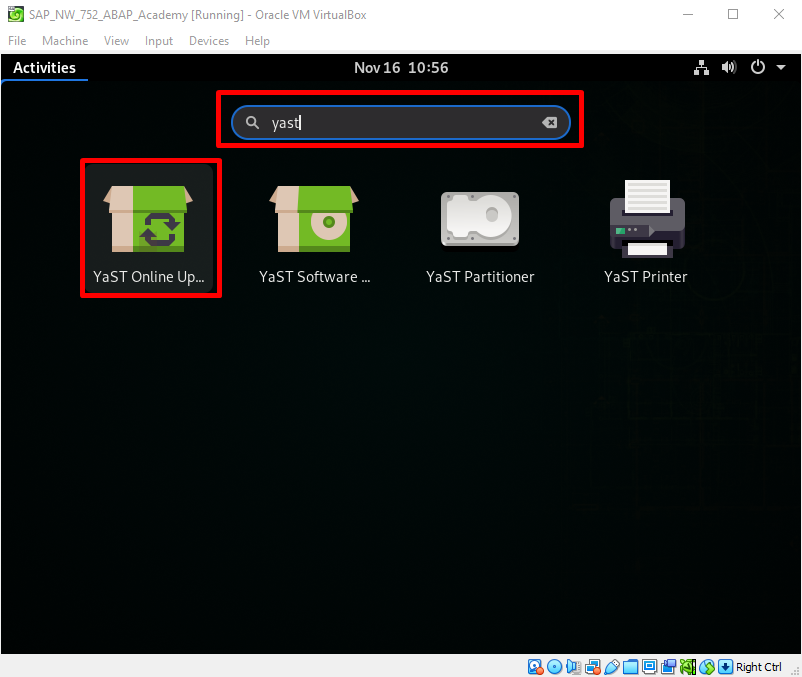
Open up YaST
Either type "yast" or "online" into the search bar
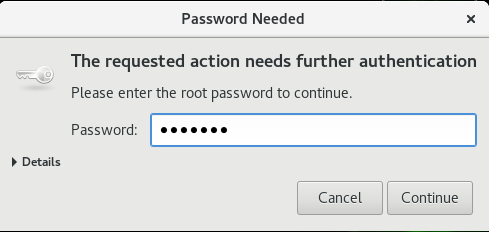
.. and provide your root password, which is "SAPSystem777"
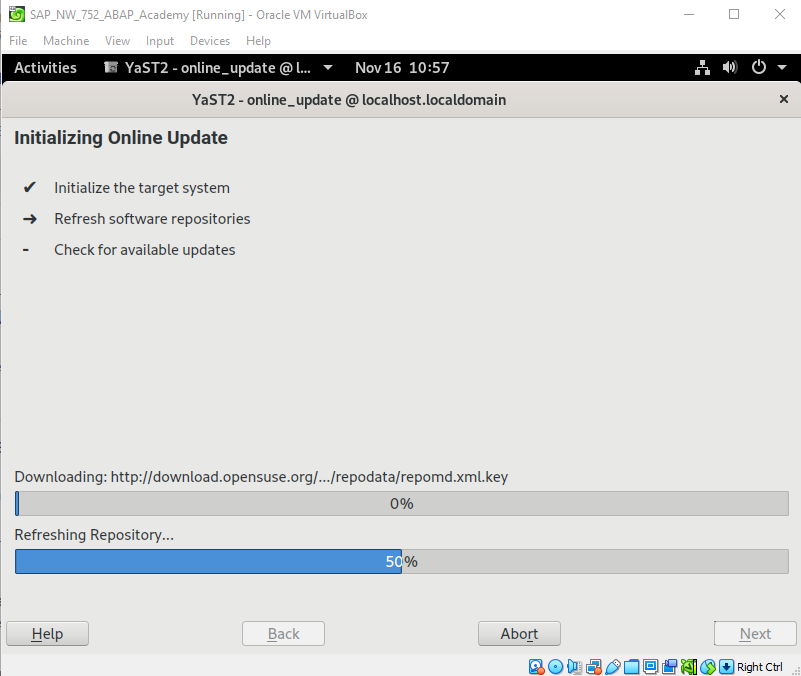
The system will immediately start to initialize Online Update by loading Package Manager.
Now we will install the uuidd daemon.
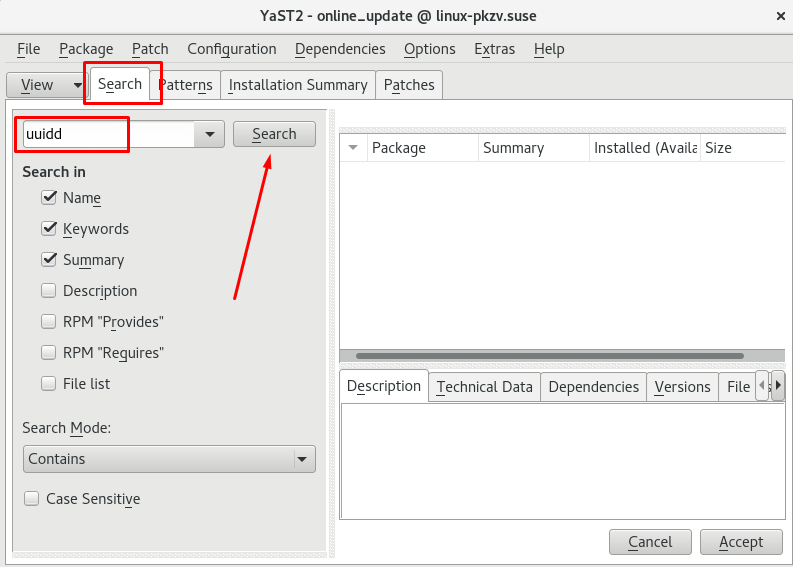
Open the "Search" tab and type down "uuidd" and hit the "Search" button
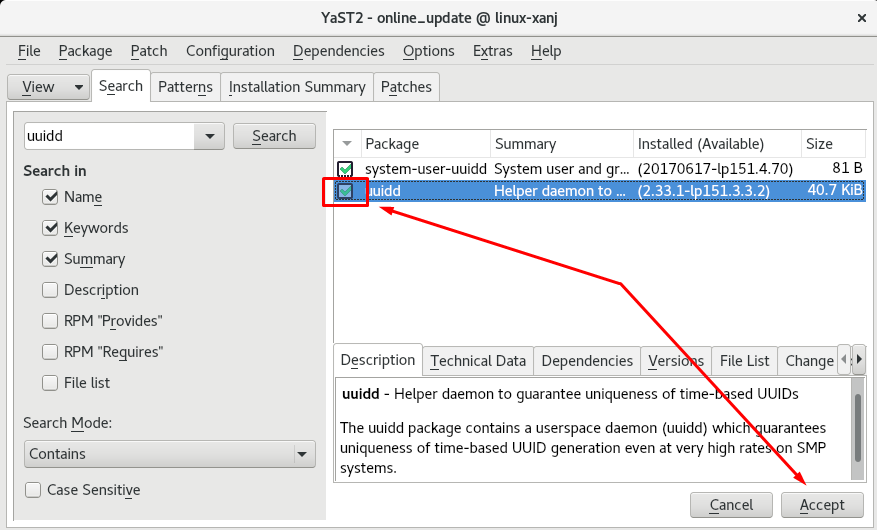
Choose "uuidd" and hit "Accept"
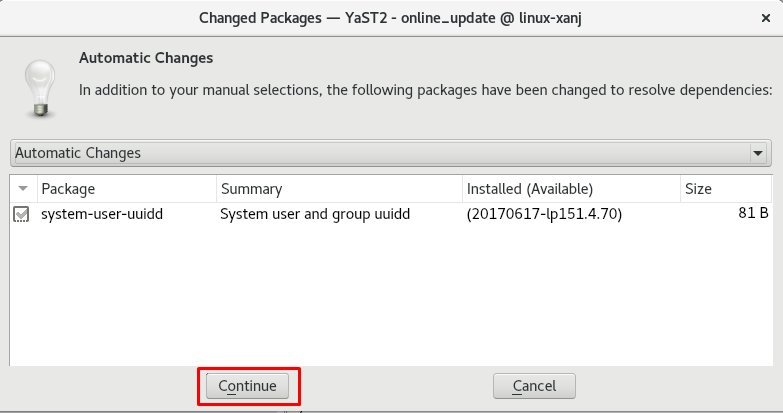
.. Continue.
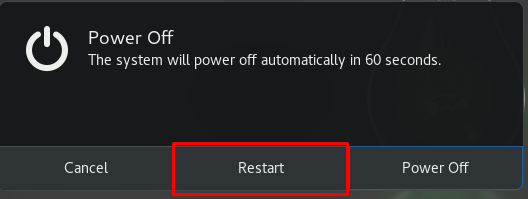
When the installation is done, close all the windows and restart the system.
We want to be 100% sure this installation takes effect.
After Reboot…
Go to Terminal and type the following command to start up the uuidd service
sudo service uuidd start
You will be prompted to provide your password and hit ENTER.

Now check if uuidd is already running:
sudo service –status-all |grep uuidd

Change Hostname
Stay in the command line and type the following command to change the hostname:
sudo vi /etc/hostname
Change the configuration from this setup:
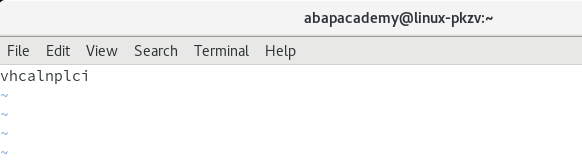
.. to the hostname "vhcalnplci" in the following way:
- Press "i" to start inserting
- Remove existing hostname
- Type in the "vhcalnplci" hostname
- Press ESC to stop editing
- Save changes by typing ":wq" (by pressing ":", VI knows that you are going to enter command, "w" stands for writing/saving and "q" for quiting)
In the end, it should look something like this:
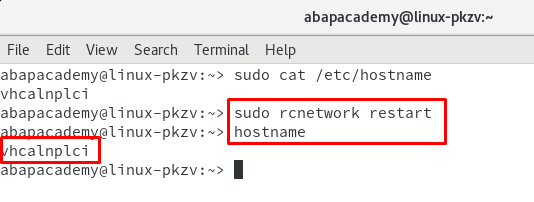
Check if the hostname is changed using this command:
sudo cat /etc/hostname

Now, restart the network and check if the hostname is changed:
sudo rcnetwork restart
hostname
Map Hosts to New Hostname
Check your IP address
sudo ip addr
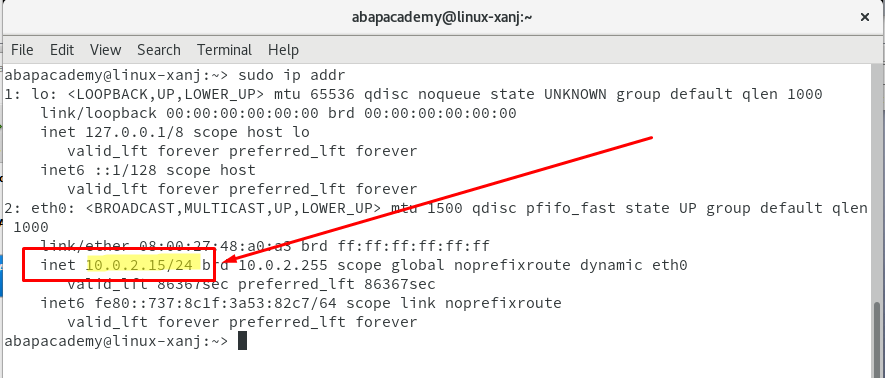
You will use an IP address without ending /24. Just "10.0.2.15"!
Open hosts file
sudo vi /etc/hosts
It will look something like this:
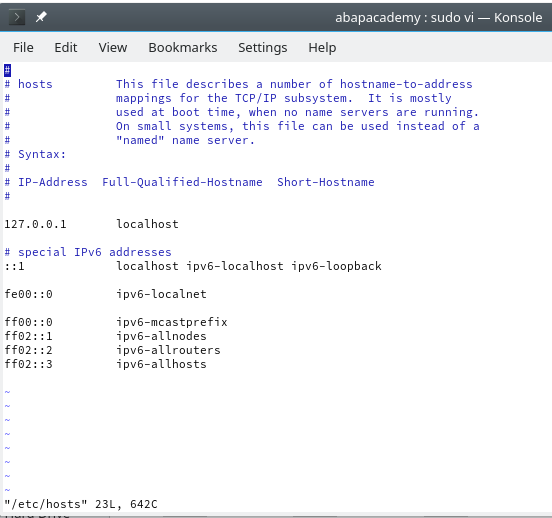
Add a new entry by following this pattern:
<IP address> <hostname> <hostname>.dummy.nodomain
In my case, this will be 10.0.2.15 vhcalnplci vhcalnplci.dummy.nodomain
- Press "I" to start inserting
- Enter 10.0.2.15 vhcalnplci vhcalnplci.dummy.nodomain
- Hit ESC
- Enter :wq
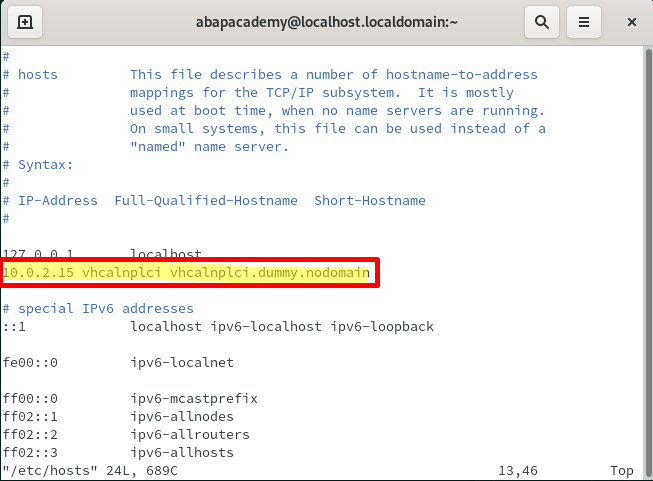
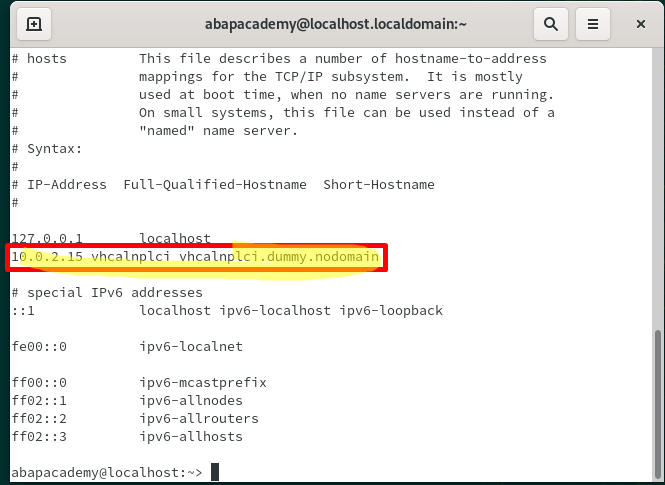
Check if changes have been successfully saved
sudo cat /etc/hosts
Till this time, you should already have your installation files downloaded.
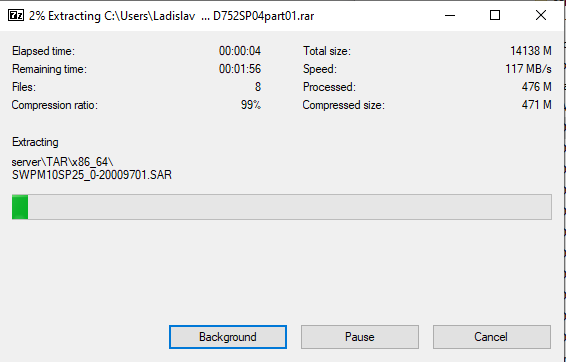
Extract the multi archive using e.g. 7-zip.
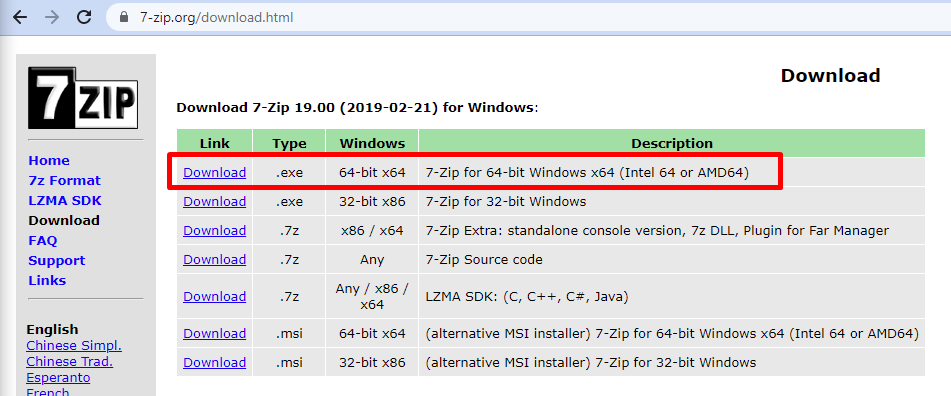
Notice: Download 7-Zip software you can go to this link
https://www.7-zip.org/download.html
In case you won't use 7-Zip, it may happen that the extraction process will not be done correctly
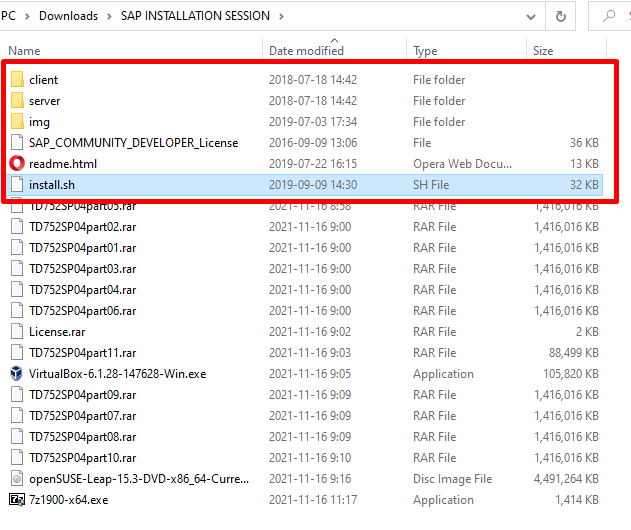
Go to the download folder, do the right click on the first part of the installation file.
In our case, it is "TD752SP04part01.rar"
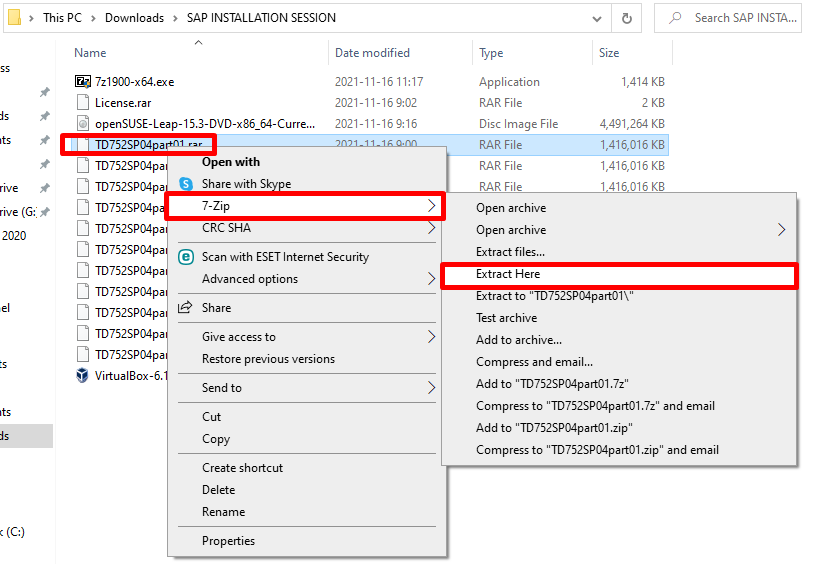
Wait until all the parts are extracted to a single one installation file.
Notice: You don't have to extract each "partXX" file, 7-Zip is going to do that for you
In the end, you should be able to find the following files from the extraction process
Assign ROOT privileges
Type following command
sudo -i

Go to the created shared folder
cd /media/sf_sapinst/
.. and change the access rights of the install script:
chmod +x install.sh
Update ASE License to Install SAP Correctly
To install SAP correctly, we have to first update the ASE license within Linux itself.
Intall SAP Server
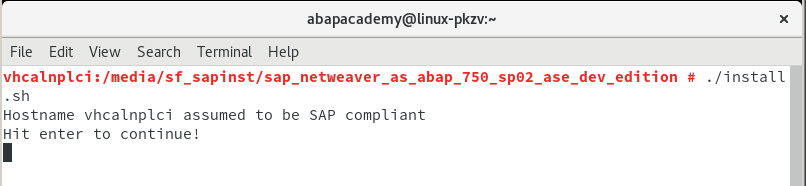
Make sure that you are already in the folder containing "install.sh" file.
Start installation with the following command:
./install.sh

Hit "ENTER" to continue
Read through the License Agreement.
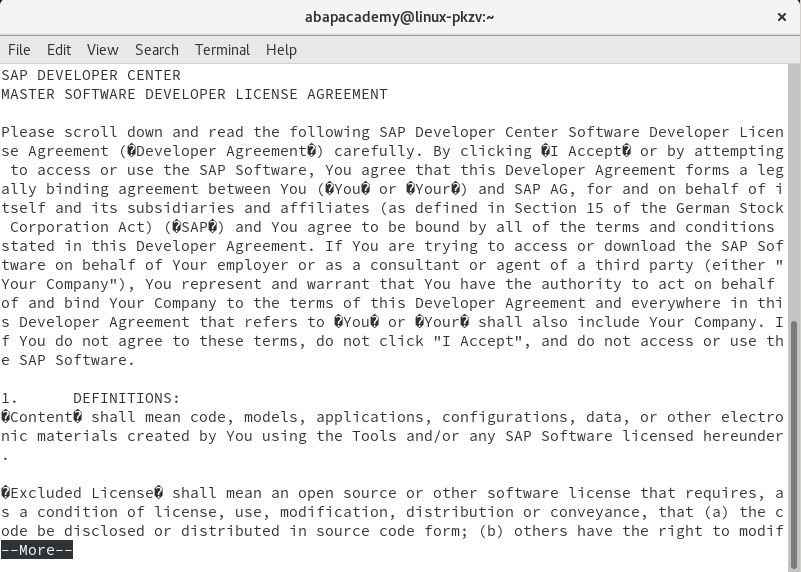
When you reach the end then press "q".
.. and Accept it by typing "yes" and hitting "ENTER"

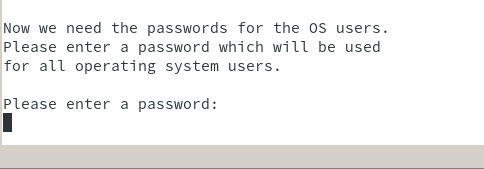
Provide a password for your OS user "SAPSystem777"
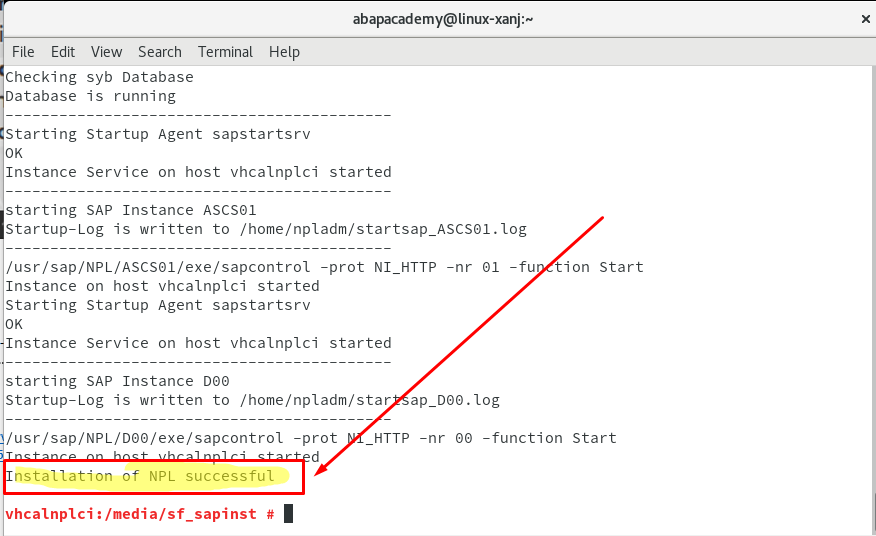
.. and wait until the installation is done. This will take quite some time, so take a coffee ;)
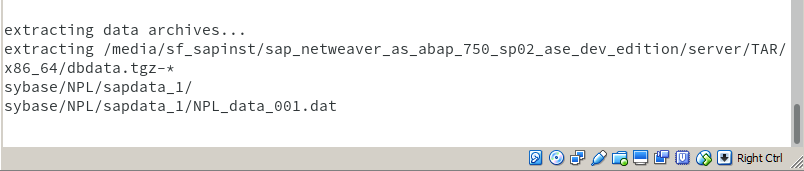
And this is what you are waiting for:
Port Forwarding
Go to VM Settings (VM can be still running. No need to shut it down).
Go to Network -> Advanced -> Port Forwarding
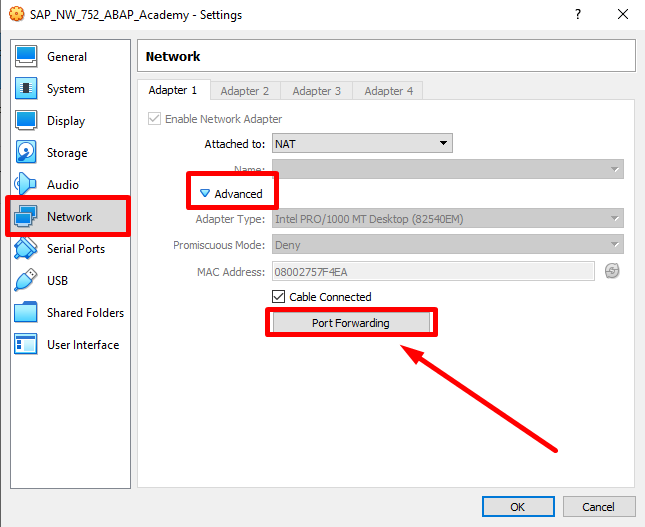
Do the following setup:
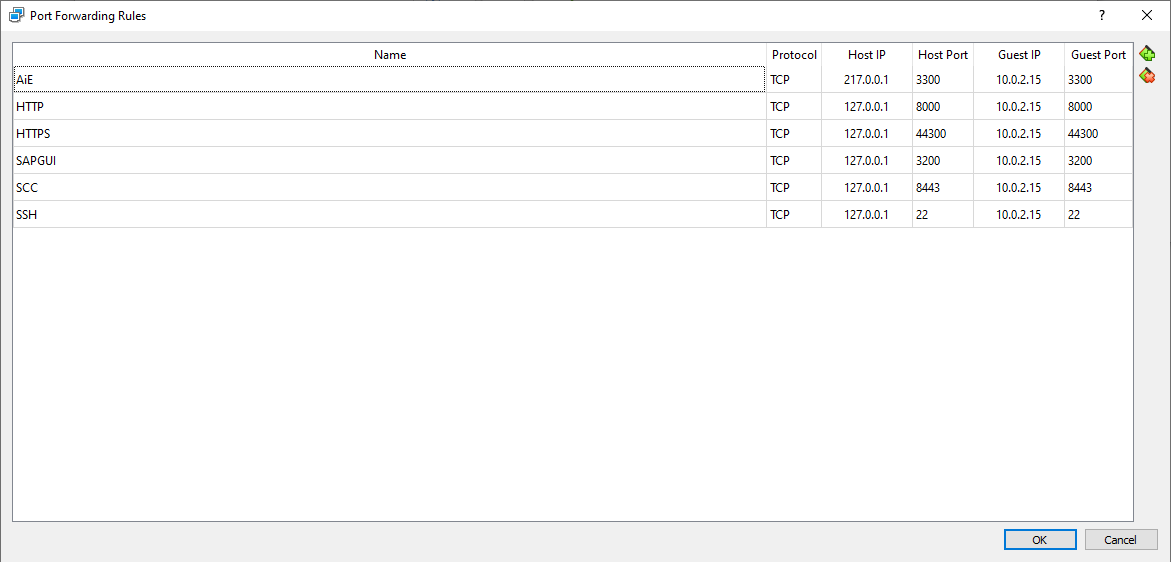
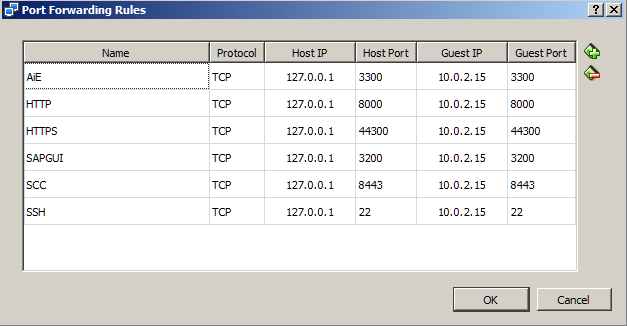
Hit "OK" and "OK".
Start SAP Server
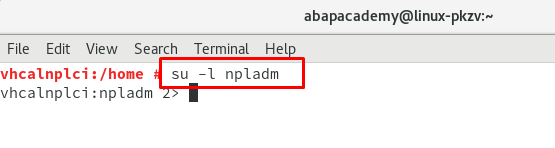
Now, when the SAP server is already installed, we need to start it up.
su -l npladm
Now we can start the whole server
startsap ALL
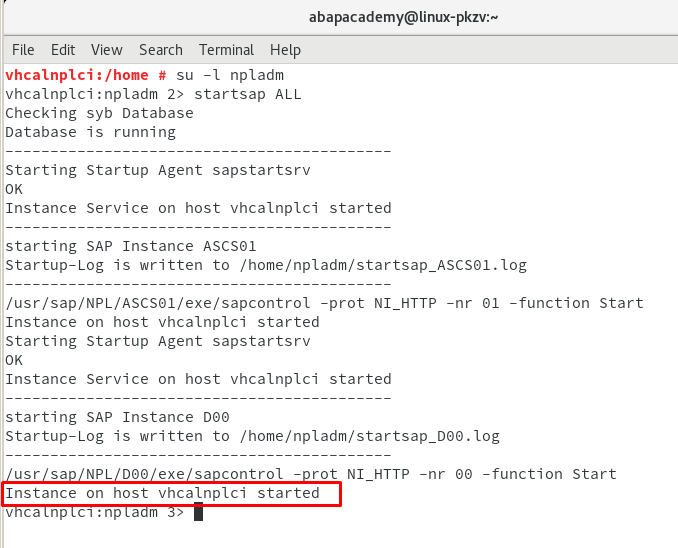
Let's check if all the processes are running (if they are in a "GREEN" state)
sapcontrol -nr 00 -function GetProcessList

If not all of them are green, just wait for a few seconds and run this command again until all of them are green.
Intall SAP GUI
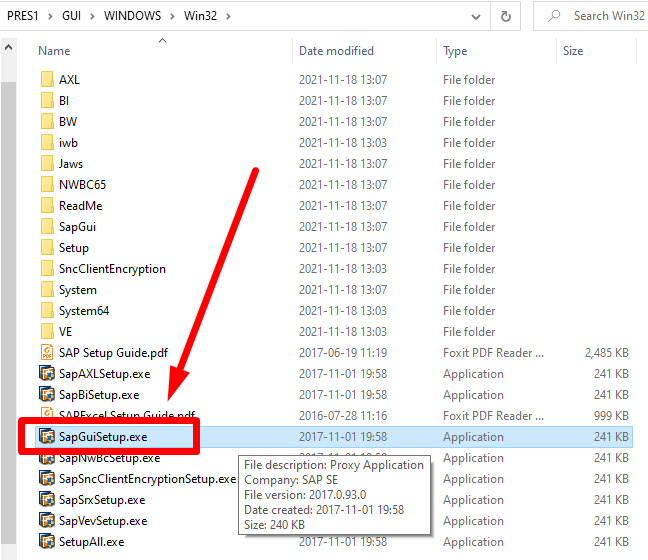
Firstly you need to locate the installation file.
It's in the extracted folder from the SAP installation folder in your "sapinst" folder.
Go to "sapinst" folder
Go to client -> SAPGUI4Windows-> 50144807_6.ZIP-> BD_NW_7.0_Presentation_7.50_Comp._2_-> PRES1-> GUI-> WINDOWS-> Win32
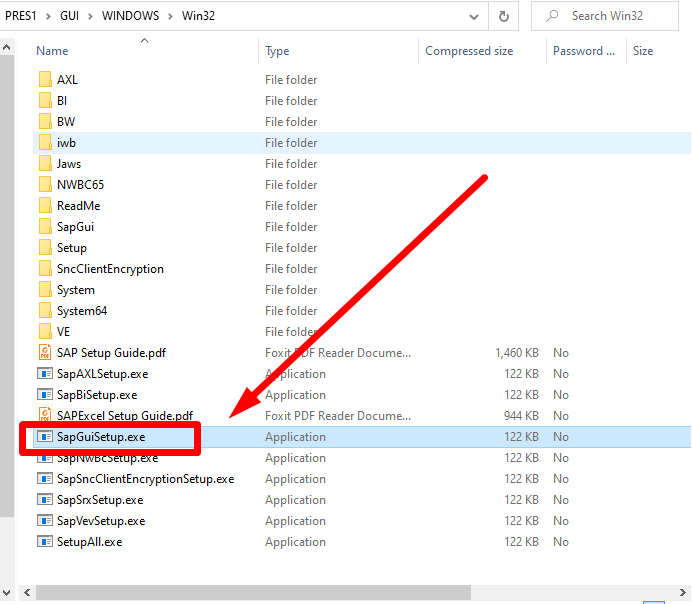
Find the SapGuiSetup.exe file and run it
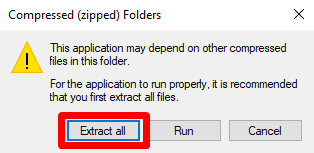
Choose "Extract all" to continue
Leave checked "Show extracted files" and hit "Extract"
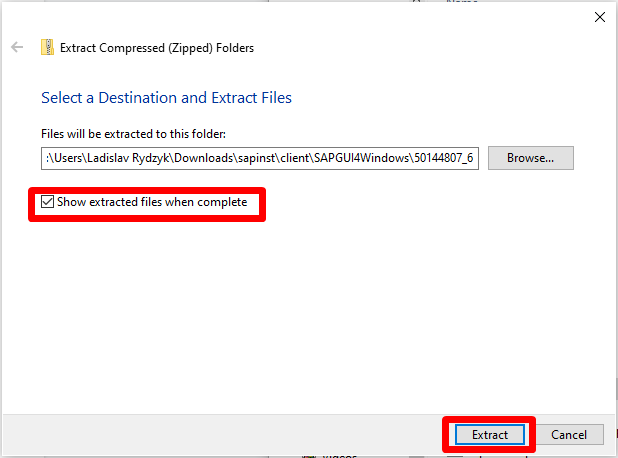
Let's give it a few moments to extract
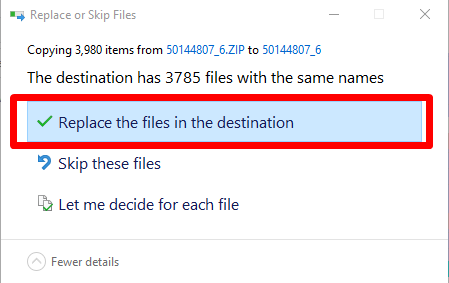
Then choose to "Replace the files in the destination"
Now navigate to extracted installation folder with the SapGuiSetup.exe folder again and run this EXE file.
Here is the route once again:
Go to Downloads -> sapinst -> client -> SAPGUI4Windows-> 50144807_6.ZIP-> BD_NW_7.0_Presentation_7.50_Comp._2_-> PRES1-> GUI-> WINDOWS-> Win32
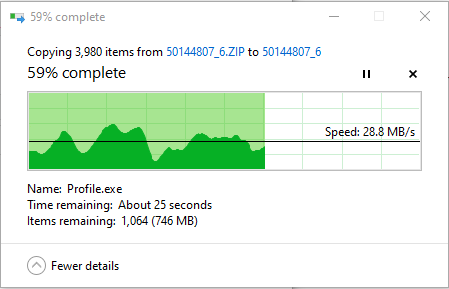
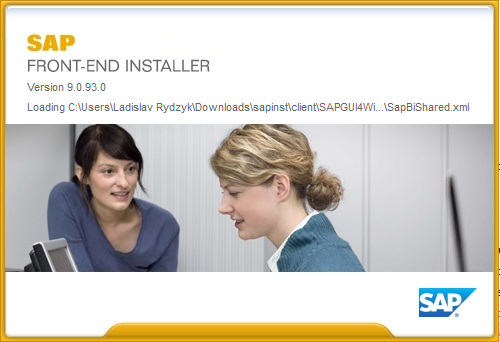
SAP GUI installation will start loading
Once loaded, hit "Next"

Select the "SAP GUI for Windows 7.50 (Compilation 2)" checkbox and hit "Next"

Installation starts processing.

SAP GUI Setup
To access the running SAP system, go to SAP GUI and create a new connection.
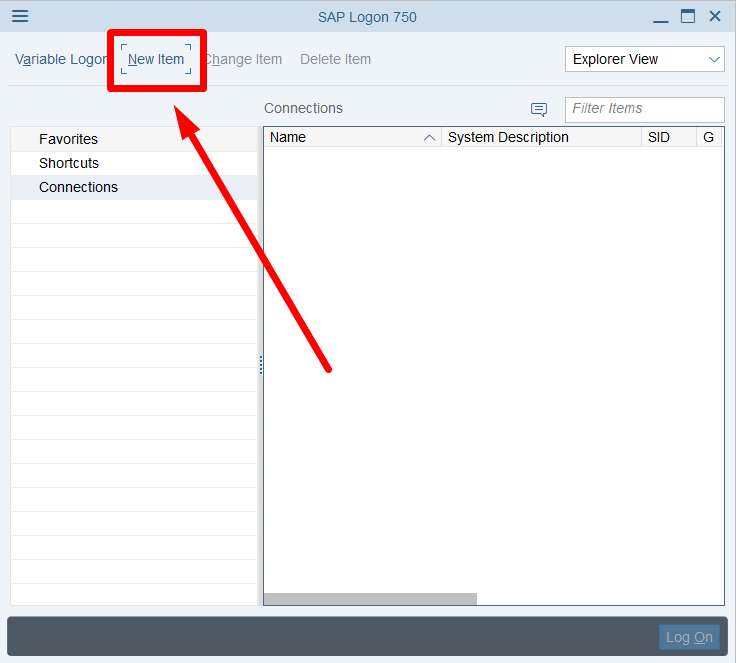
Hit "Next".

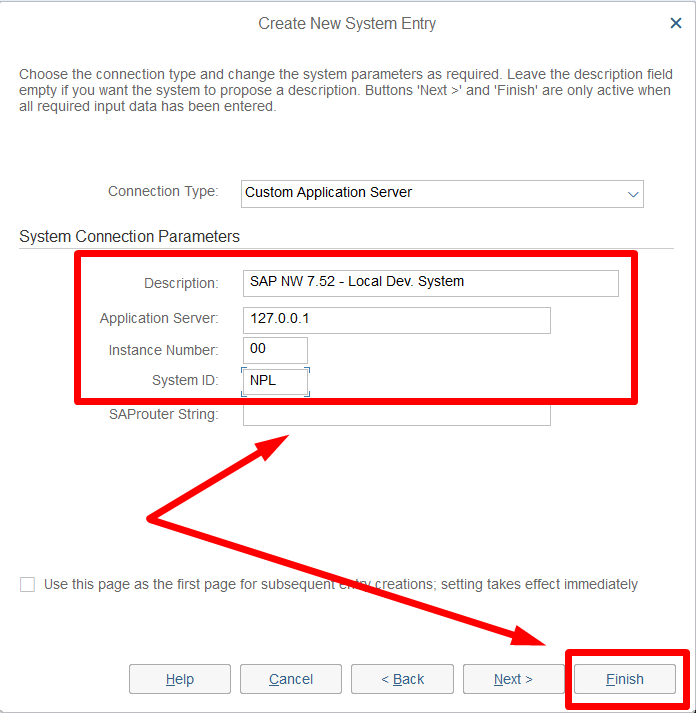
.. and fill in the following settings:
Description: SAP NW 7.52 – Local Dev. System
Application Server: 127.0.0.1
Instance Number: 00
System ID: NPL
Then hit "Finish".
Now connect to your SAP server either by doublecking on the created connection or by selecting it and then hitting the "Log On" button
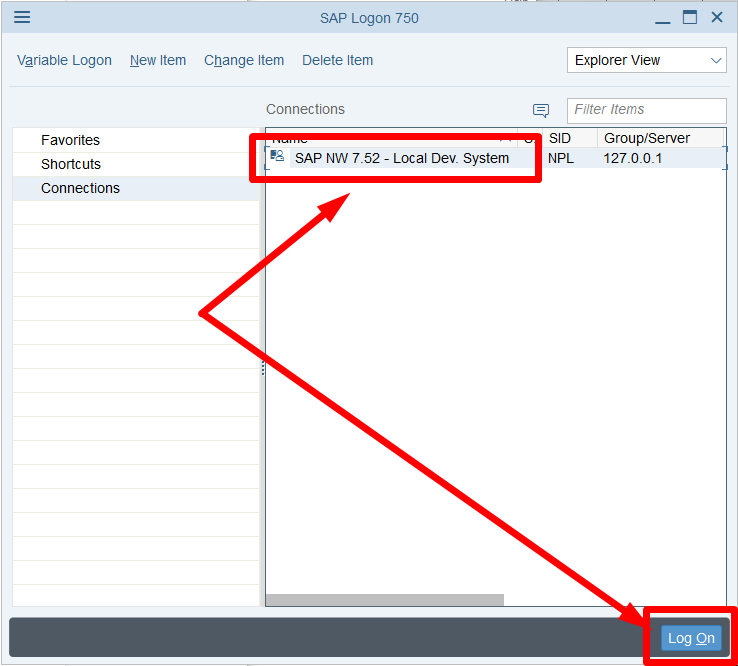
.. and you should already see the window with the SAP system.
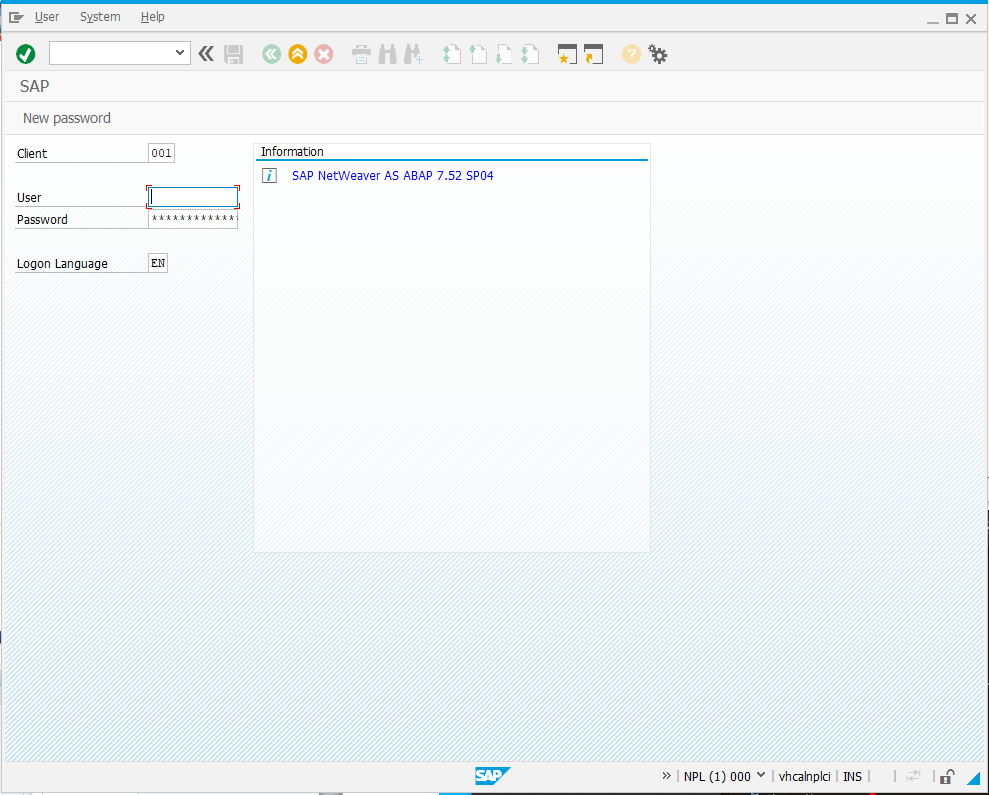
Log in to the System
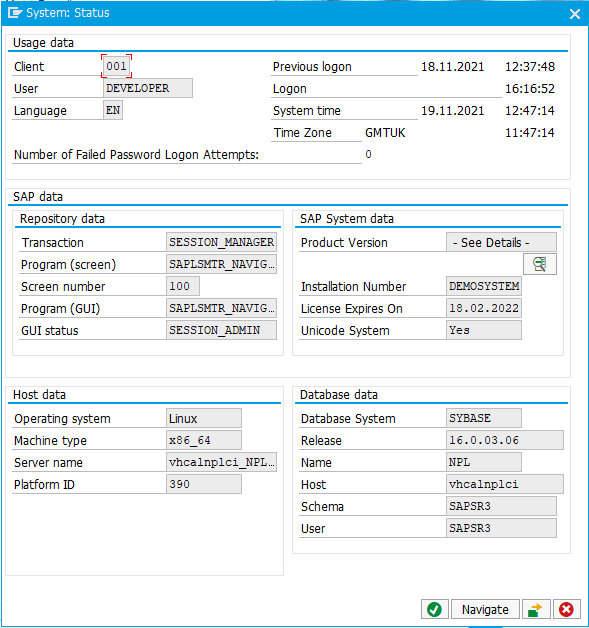
For this system, a special user has already been created for development purposes. Log in, using the following logon data:
User: DEVELOPER
Password: Down1oad
!!! IMPORTANT NOTICE!!! : In the password there is number one 1 instead of L -> l, so the password is not Download but Down1oad
After hitting "ENTER", you should log in directly to the system.

Generating New License
Before moving forward, you must regenerate the existing license for your SAP system.
This will give you developer rights for your user.
Even if you will find that your license is still valid, you will have to first delete all the licenses from your system
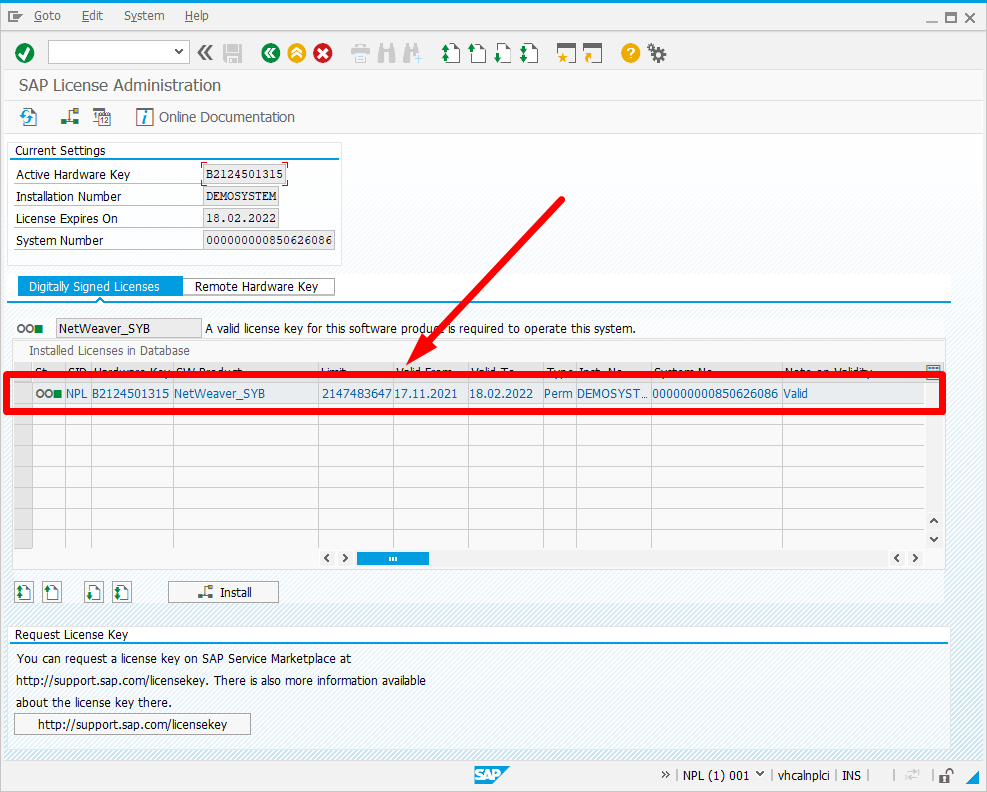
To proceed with the license regeneration, follow this guide for "Prolonging the license".
This is the procedure you will have to follow each and every 3 months to prolong the license for this system.
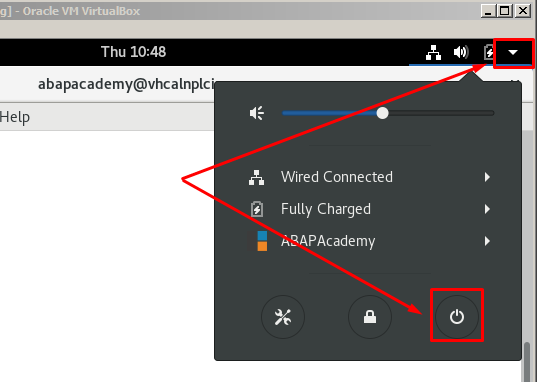
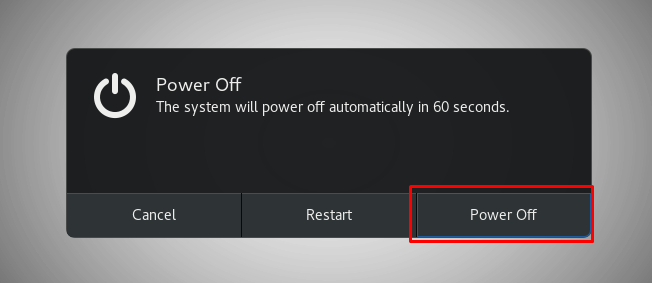
Stop Server
When you are done and want to stop the server, go to the command line and run this command:
stopsap ALL
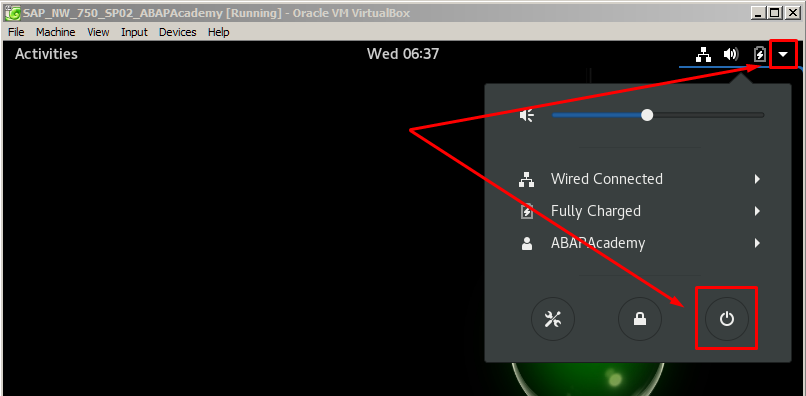
After SAP has stopped, you need to shutdown your openSUSE:
Troubleshooting
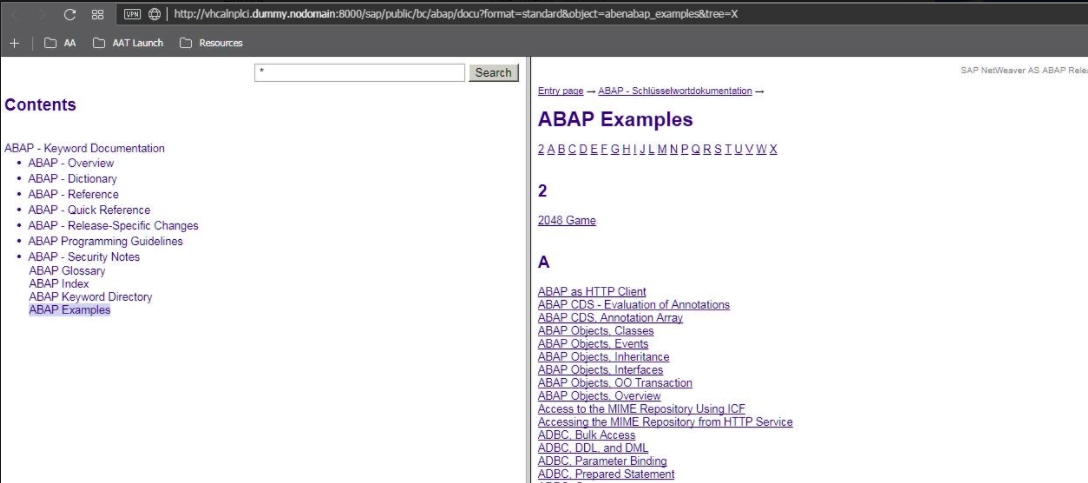
Not possible reach the vhcalnplci.dummy.nodomain or vhcalnplci:8000
After login, you click on the link at the user sample menu, for example, User Menu for John Doe ->Plain ABAP-> ABAP Samples. When the browser opens, you get an error message, saying is not possible to reach the vhcalnplci.dummy.nodomain or vhcalnplci:8000.
Everything on the server is green and running.
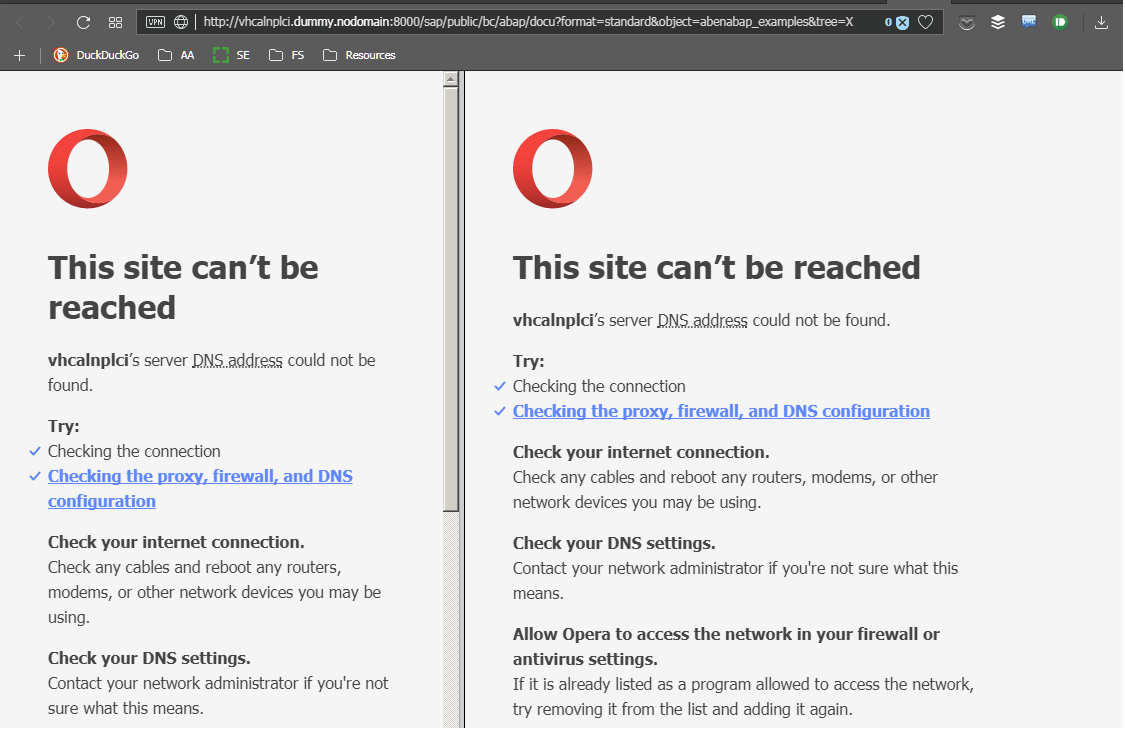
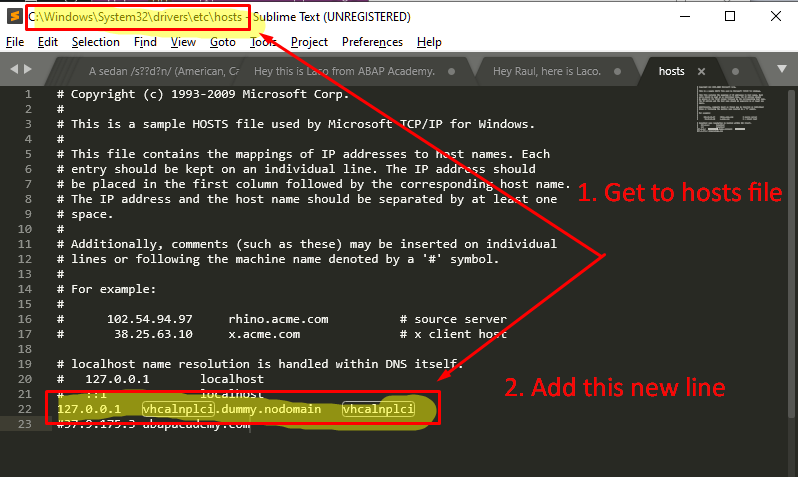
Solution: Update 'hosts' File on Your Client Machine
- Go to 'hosts' file on your PC/Mac/Linux
- Windows: C:\Windows\System32\drivers\etc\hosts
- Open this file for editing
- Add the following line to the file: "127.0.0.1 vhcalnplci.dummy.nodomain vhcalnplci"
- Save it
The result should look something like this:
Then when you try to call out the same menu option, you get the correct behavior:
Setting Up Web IDE
Follow this tutorial to setup Web Access
https://blogs.sap.com/2014/02/06/how-to-configure-your-sap-gui-html-for-web-access/
Access links to Web IDE
https://vhcalnplci:44300/sap/bc/gui/sap/its/webgui
https://127.0.0.1:44300/sap/bc/gui/sap/its/webgui
Or
http://127.0.0.1:8000/sap/bc/gui/sap/its/webgui
Use the very same login information as in SAP GUI
Fiori Launchpad
https://vhcalnplci:44300/sap/bc/ui2/flp?sap-client=001&sap-language=EN#Shell-home
http://vhcalnplci:8000//sap/bc/ui2/flp
SE80 Windows are Resized

Shared Clipboard in VirtualBox not Working
Workaround
Run this command in Terminal
/usr/bin/VBoxClient –clipboard
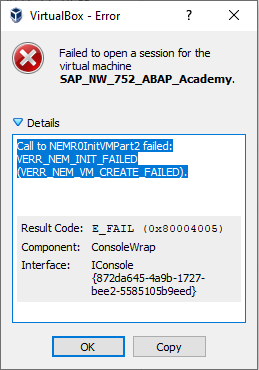
Call to NEMR0InitVMPart2 failed: VERR_NEM_INIT_FAILED (VERR_NEM_VM_CREATE_FAILED).
This problem has occurred after the installation of the newest updates in Windows 10.
The solution is to run the following command on your Windows.
Go to Windows Start pressing the Win key on your keyboard.
Type there "cmd"
Do the right click on the "Command Prompt" and choose to "Run as Administrator"
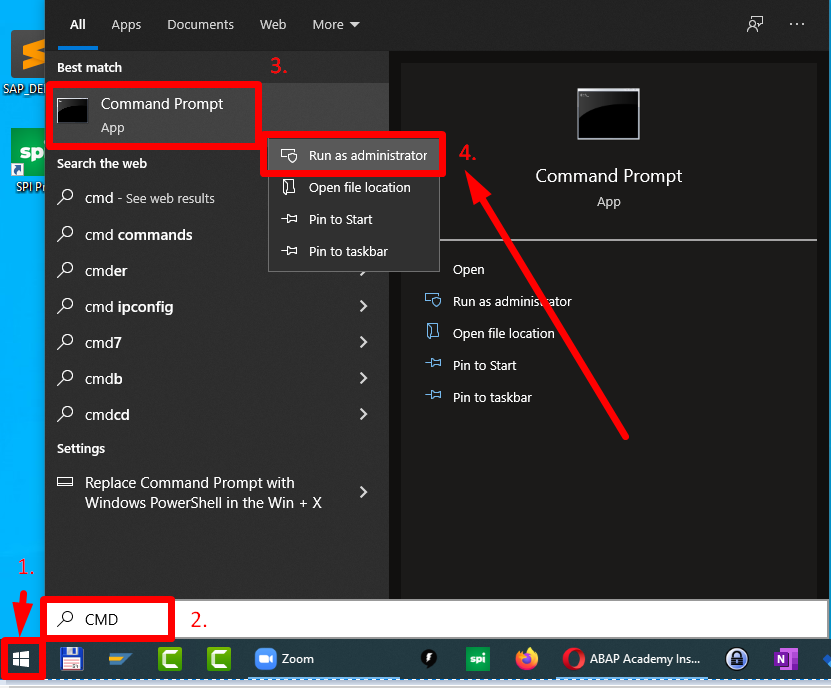
Pate this command and hit ENTER
bcdedit /set hypervisorlaunchtype off
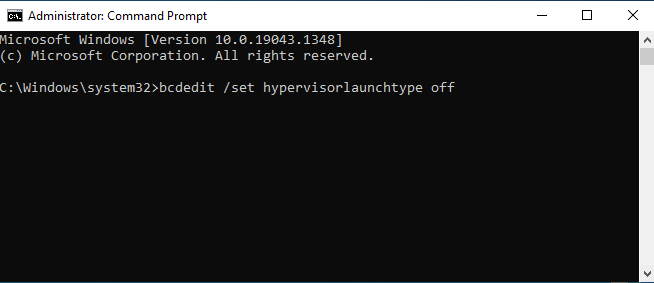
And restart your PC.
More information in this thread: https://forums.virtualbox.org/viewtopic.php?f=6&t=104175&start=15
pic#0: Config mismatch – uApicMode: saved=2 config=3 [ver=5 pass=final] (VERR_SSM_LOAD_CONFIG_MISMATCH).
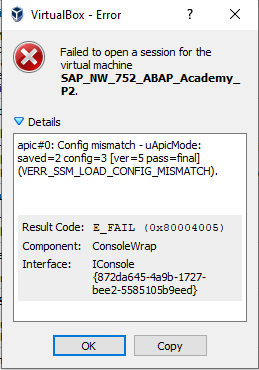
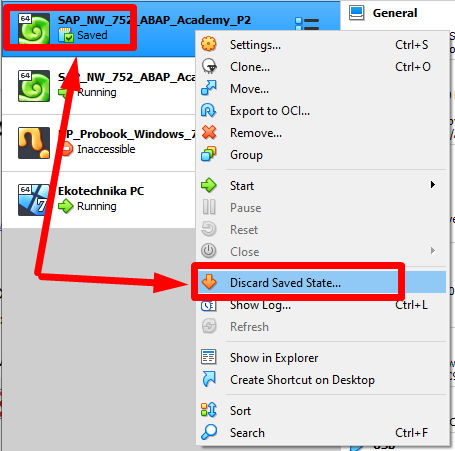
This problem occurs when the VM machine is in the "Saved" state.

The solution to this problem is to discard the saved state and boot the machine from scratch.
Right-click on the machine you want to fix and choose "Discard Saved State…"
Are you Ready to Start Growing Your ABAP Career?
Now, when your SAP system is up and running, it's time to start getting real programming skills in ABAP!
Source: https://abapacademy.com/blog/how-to-install-free-sap-system/
Posted by: infinitelycube.blogspot.com